When you embark on a project, the first thing a developer ought to do is to run some basic math. Especially if you already have some specs regarding the number and sizes of assets. Because otherwise you may end up trying hard to work around a memory related issue which perhaps even modern desktop computers would struggle with.
So today, I’ll do some math for you, the things you should consider before starting a project or adding one more of those big new shiny features to your app. Kind of like an addendum to my popular article about memory optimization and reducing bundle size.
How much wood texture would a woodchuck choke on if a woodchuck could choke on wood textures?
A texture is an in-memory representation of an image made up of individual pixels. Each pixel uses a certain amount of memory to represent its color. A texture’s memory size is therefore simply the product of width * height * sizeof(color).
Before I go any further, I like to stress it again: the size of an image file is much smaller than the size of the texture generated from the image. Don’t use image file sizes to make memory usage estimations.
Most common are 32-Bit and 16-Bit textures which use 4 and 2 Bytes respectively per pixel. A 4096×4096 image with 32-Bit color depth therefore uses 64 MB memory. Let that sink in for a moment …
At 16-Bit it only uses half of that, though without color dithering (TexturePacker does this for you) this might not look too good depending on the image.
This is pretty much what you’re stuck with unless you export textures as .pvr.ccz. Not only does this format load tremendously faster than PNG (not to speak of JPG which are unbearably slow to load in cocos2d), the .pvr.ccz format also reduces the texture memory size because the texture can stay compressed in memory.
It’s extremely difficult to estimate how much smaller a PVR texture’s memory footprint will be without actually giving it a try. But you can expect anywhere between 10% to 50% reduction.
To the non-power-of-two!
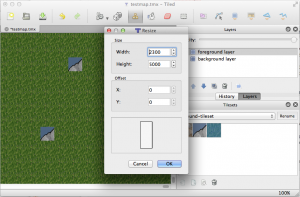 I’m currently working on a new tilemap renderer for KoboldTouch.
I now have an early version that’s fairly complete and does most of what cocos2d’s tilemap renderer can do. Pun intended: yes, cocos2d’s tilemap renderer really doesn’t do all that much: load and display tilemaps with multiple layers.
In fact my current implementation is one step ahead already:
KoboldTouch’s tilemap renderer doesn’t require you to use -hd/-ipad/-ipadhd TMX files and the related (often hard to use or buggy/broken) TMX scaling tools. Just use the same TMX file designed for standard resolution, then simply provide just the tileset images in the various sizes with the corresponding -hd/-ipad/-ipadhd suffixes. The tilemap looks the same on a Retina device, just with more image detail.
Performance Comparison
Anyhow, I thought I’ll do some quick performance tests. I have a test map with 2 layers and a tiny tileset (3 tiles, 40×40 points). I’m comparing both in the same KoboldTouch project, using the slim MVC wrapper (named KTLegacyTilemapViewController) for cocos2d’s tilemap renderer CCTMXTiledMap. Continue reading »
I already blogged about scaling node positions with display resolution. This feature is now built into KoboldTouch. Time for a demonstration before I get back to work on an improved Tilemap renderer:
The cool thing about KoboldTouch autoscaling is that it works transparently. Your nodes will be positioned relative to the design resolution, for example 480×320. The nodes will continue to use the same position on any device! So you just develop these nodes’ positions and their movement as if they were always on a 480×320 device. It’s that simple.
It also works for movement of any kind, be it CCMove* actions or manually updating the position property every frame. Moving nodes continue to move seemlessly even when you rotate the device. Continue reading »
 There hasn’t been a new Cocos2D Podcast in over 4 months.
It was about time Mohammad Azam and I recorded another one.
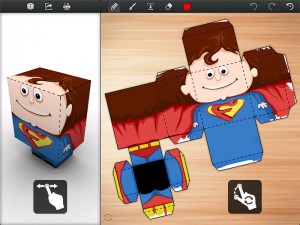
This time our guest was Krzysztof Zabłocki, developer of the Foldify app and contributor to cocos2d-iphone.
Among other improvements Krzysztof added stencil buffering to CCRenderTexture.
Interviews with Mobile Game Engine Developers
The Mobile Game Engines eBook is now available!
One of the interviews is with me, about Kobold2D. KoboldTouch was at the time no more than an idea.
Jason Brownlee gave me permission to share the full interview with me (PDF, 18 pages). Go on, read it!
There are of course plenty more reknown game engine developer interviews in this book. Here’s the full list of interviewees: Continue reading »
Here’s a quick tip on how to design your scenes so that they scale up to higher resolution displays. For example when your app runs on a widescreen iPhone / iPod touch or on an iPad. This article is not about Retina displays, which use the same coordinate system and merely display higher resolution images.
Design for the lowest supported resolution
First, design your game to the lowest device/window resolution that your app supports. In most cases this will be the 480×320 points used by the majority of iPhones.
Contrary to images, you always want to scale your designed screen layouts up and never down. This is because upscaled screens will always fit on the device’s display, with more or less additional spacing between the nodes. Downscaling however might cause screen elements to overlap, which is hard to fix if you don’t see the overlap in the resolution you design for.
It’s also easier to make manual changes to upscaled screen layouts than it is for downscaled screen layouts.
Calculate the scaling factor
By dividing the current device/window size with the resolution you designed for, you get the scaling factor by which you have to multiply positions. This is a simple wrapper you can use:
|
1 2 3 4 5 6 7 8 9 |
static CGSize designSize = {480, 320}; -(CGPoint) scalePoint:(CGPoint)point { CGSize winSize = [CCDirector sharedDirector].winSize; CGSize scaleFactor = CGSizeMake(winSize.width / designSize.width, winSize.height / designSize.height); return CGPointMake(point.x * scaleFactor.width, point.y * scaleFactor.height); } |
To make a node’s position resolution independent, use the position you would use for a 480×320 screen and scale it up:
|
1 2 |
// centers the sprite, regardless of window size sprite.position = [self scalePoint:CGPointMake(240, 160)]; |
This even works for autorotation. If you use NSNotificationCenter to receive orientation change events, you can use the scalePoint method with the current position to generate the node’s position after the rotation happened. You can try by simply changing the designSize to {320, 480} and setting the app’s default orientation to Portrait.
Caveats
Of course it’s entirely up to you what makes sense, which nodes can be scaled and which should not. For example squeezing a landscape app in portrait mode is possible, but it simply won’t make for a good user experience. However scaling HUD elements that should be aligned with one side of the screen so that they automatically stick to the side of the screen (ie widescreen iPhones, iPad) would be a huge timesaver.
If you update your node’s positions manually in order to move them, then you may have to also scale the amount by which the node moves. It’s easy to do by multiplying the movement vector with the same scale factor.
This won’t work well for actions, which may run faster (or sometimes even slower) depending on window size and aspect ratio. But it’ll work with actions nonetheless if you also apply the scale factor to the target position.
Another issue to watch out for is to accidentally scale up a position, and then scale it up again. This can happen if you’re not careful when updating more complex algorithms or dependencies where more than one method updates the node’s position. The best way to avoid that is to ignore scaling until just before the screen is drawn. You could override the draw or visit method (don’t forget to call super) and scale the position:
|
1 |
self.position = [self scalePoint:self.position]; |
After drawing is complete you could then reset the position back to its original by dividing by the scale factor. I’ll leave it up to you to add a convenience method for that. That would make the position scaling completely transparent to your app and you could simply consider all screens to be in the designed for resolution.
KoboldTouch
I will be adding a KTAutoscaleController to KoboldTouch soon to make this easier for KT users. This will be a really nice feature to have, and really easy to use:
|
1 2 3 4 5 6 7 |
KTAutoscaleController* autoscaleController = [KTAutoscaleController controller]; autoscaleController.designResolution = CGSizeMake(480.0f, 320.0f); [self addSubController:autoscaleController]; // autoscale this sprite's position depending on window size [autoscaleController autoscaleNode:sprite scaledProperties:KTAutoscalePropertyPosition]; |
Until next year, have an enjoyable year’s end!
Check out this new gameplay video from the official YETIPIPI website:
Get the game here. Note: it’s only available in Germany & Austria for now, worldwide release will hopefully be in January.
You can find more details about the game including a technical postmortem in an earlier blog post.
Also for the german speaking crowd (and those who are really quick to learn a new language): Game One posted a video interview with cartoonist Joscha Sauer about the game. Game demo starts at 11:30.
I’m really happy and excited that YETIPIPI was released today in the iOS App Store! 
UPDATE: currently only available in german App Store due to delayed english localization.
Go grab it for $.99 (€.89) try it out and give it it’s (hopefully) deserved 5-Star review.
What’s the game about?
YETIPIPI was a contract project in collaboration with Doubleplus Digital Media Entertainment for Joscha Sauer. Joscha is one of germany’s most popular cartoonists and the mastermind behind the Nichtlustig cartoons (some of his cartoons are also available in english).
The game is inspired by one particularly famous comic strip, where a Yeti pees in a circle, leaving him (or in this case both) stranded in an unfortunate situation.

To survive, our Yeti must drink so he can pee the ice floes floating about in ever smaller pieces. You control the Yeti with the accelerometer to collect items, evade ice floes and to aim your stream of urine. Continue reading »


