Since I started working on KoboldTouch a couple things fell into place. Mainly that it would:
Provide what Cocos2D leaves up to its users. Fixes what Cocos2D does badly. Adds what Cocos2D doesn’t do at all. Eases development with Cocos2D and accommodates actual developer needs.
While Cocos2D is moving towards cross-platform with their Javascript API, KoboldTouch will focus on adding & improving game design features.
I have a hunch most Cocos2D developers have better iOS/Mac integration and game-specific features higher up on their wish list than cross-platform. Most of you are indies, hobbyists, pragmatists and Apple enthusiasts without the need or resources to do cross-platform development.
UPDATE: KoboldTouch is now available!
KoboldTouch: Spiritual Successor
I first started working on KoboldTouch a few weeks back. I initially undersold it as a “MVC wrapper for Cocos2D”. With what I have in mind spiritual successor of Cocos2D is more like it.
It’s going to be a framework to program iOS & Mac games in, where best practices evolve naturally, where Cocoa programmers feel right at home, where beginners are not left in a void * EXC_BAD_ACCESS … and where Cocos2D is still at the heart of it.
KoboldTouch takes control over Cocos2D, to allows users to implement best practices naturally. Cocos2D provides the view, KoboldTouch provides the controllers, models and the framework to write your code in.
|
KoboldTouch brings you the best 2D game development experience for Apple’s platforms!
KoboldTouch is the only Objective-C, ARC-enabled 2D game engine built on the Model-View-Controller (MVC) design pattern. Write ambitious games with greater ease!
KoboldTouch is also a continuously evolving, customer driven game development framework for iOS & Mac OS X, designed by game industry veterans to incorporate game development best practices and decades of experience.
Learn more about KoboldTouch features and what’s in it for you:
Open the “About KoboldTouch” Page for Details
Not quite ready for KoboldTouch yet?
Fill out the KoboldTouch Survey. Let us know what you think of KT and how to make it better.
Get KoboldTouch!
KoboldTouch is available as a subscription program that entitles you to updates and support.
Choose Your Support & Updates Plan
Recurring billing may be cancelled at any time. The yearly plan is non-recurring.
Monthly
$14.95
You will be charged $14.95 every month.Quarterly
$39.95
You will be charged $39.95 every 3 months.One Year
$119.95
You will be charged $119.95 once. No automatic rebills.
60-Day Money Back Guarantee
If you’re not satisfied you can request a refund within 60-days from the date of purchase, directly via Clickbank.
 Here’s a crazy thought: with commercial game kits (game source code products) being popular and financially rewarding – why not crowd-fund an iOS game by selling it’s source code, resources and development insights while you’re creating it?
Marcus and I will give this idea a spin. Marcus is a game designer I worked with at Electronic Arts Phenomic for 6 years. I’m sure you know me. Together we’re going to create a tilemap-based physics game using cocos2d and KoboldScript (Lua scripting for cocos2d). And we are going to sell everything we’ll create practically from day one.
If that sounds even slightly intruiging to you, we’d love to get your feedback!
Visit the launch page and take our survey which has already helped us tremendously to focus on what’s important for you. For example I’ve converted the entire KoboldScript library to use ARC seeing how important ARC is to you.
But do keep on reading for more details … Continue reading »
I took Mike Ash’s performance measuring code from 2008 with the improvements made by Stuart Carnie in early 2010 and turned that into a performance measuring project for 2012.
I know it’s still 2011, consider this a forward-looking statement. In any case, the test project is available for download, ready to run, includes Cocos2D v1.0.1 and is relatively easy to modify for your own needs. This project is also available on my github repository where I host all of the iDevBlogADay source code.
Since numbers are so dry and hard to assess, you’ll find the rest of this post garnered with charts and conclusions based on the results obtained from iPhone 3G, iPod 4 and iPad.
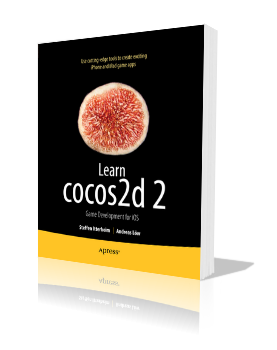
For the second edition of the Learn Cocos2D book I compiled an alphabetically sorted list of tools that developers can use for cocos2d projects. Please let me know if there’s a tool missing from this list or if there’s one that won’t work anymore and hasn’t been updated in months.
The following tools can be used for development with cocos2d:
Bitmap Font Tools
BMFont (Windows)
Fonteditor
Glyph Designer
bmGlyph
Hiero
LabelAtlasCreator
Particle Editing Tools
ParticleCreator
Particle Designer
Physics Editing Tools
Mekanimo
PhysicsBench
PhysicsEditor
VertexHelper
Scene Editing Tools
CocosBuilder
Cocoshop
LevelHelper
Texture Atlas Tools
DarkFunction Editor
SpriteHelper
TexturePacker
Zwoptex
Tilemap Editing Tools
iTileMaps developed by Vsevolod Klementjev is a Cocos2D app for iPad that allows you to edit tilemaps in the TMX format, the same format used by the popular Tiled Map Editor.
Although built with Cocos2D the tilemaps created with iTileMaps can be used with any game engine that supports loading the TMX format. To get ahold of the tilemaps created with iTileMaps you can export them directly to your game or send them via e-mail. Great for designing levels on the road!
Check out this fast-forward movie to see it in action:
Check out the iTileMaps website and/or get it on the iTunes App Store.
An ongoing discussion about how to correctly send/receive data with Game Kit on Cocos2D Central prompted me to write a demo project to complement the Learn Cocos2D book’s Game Center chapter. The resulting working code is in this post, and also reprinted below.
The Game Kit Data Send/Receive Demo Project (download here) is based on the Learn Cocos2D book code made for the Game Center Chapter. It’s called Tilemap16 just to stay in line with the naming scheme.
You control the little Ninja as usual, but this time anytime you move it, it will also move on all other connected devices because the tile coordinate is sent via Game Kit to all connected players but only when it actually changes. The demo even allows you to move the Ninja on any device, and all others will follow, so it truly works in every direction. In addition, a score variable (int) is transmitted every frame just to show how to send different types of data at different times.
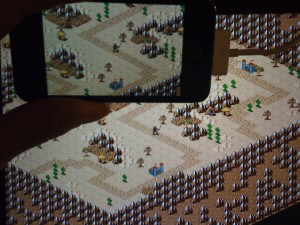
I wish I could have made a movie to show how cool this is but alas, my iPod was busy running the demo, so all I can show as proof is my iPod and iPad running the game with both Ninjas at the same position (mushy image made with my already-ancient iPhone 3G under perfect programming but terrible lighting conditions):
Source Code Example
In summary this is the code that’s used to send/receive data with the help of the GameKitHelper class I wrote for the book (also included in the download and free to use for anyone and any purpose):
[cc lang=”ObjC”]// add this to the header
typedef enum
{
kPacketTypePoint,
} EPacketTypes;
typedef struct
{
EPacketTypes type;
} SPacketInfo;
typedef struct
{
EPacketTypes type;
CGPoint point;
} SPointPacket;
[/cc]
Sending a packet:
[cc lang=”ObjC”]
-(BOOL)ccTouchBegan:(UITouch *)touch withEvent:(UIEvent *)event
{
CGPoint location = [touch locationInView: [touch view]];
SPointPacket packet;
packet.type = kPacketTypePoint;
packet.point = location;
gkHelper = [GameKitHelper sharedGameKitHelper];
[gkHelper sendDataToAllPlayers:&packet length:sizeof(packet)];
}
[/cc]
Receiving the packet:
[cc lang=”ObjC”]
-(void) onReceivedData:(NSData*)data fromPlayer:(NSString*)playerID
{
// first, assume it’s the general SPacketInfo, that way we can access type
SPacketInfo* packet = (SPacketInfo*)[data bytes];
switch (packet->type)
{
case kPacketTypePoint:
{
SPointPacket* pointPacket = (SPointPacket*)packet;
CCLOG(@”received point: %.1f, %.1f”, pointPacket->point.x, pointPacket->point.y);
break;
}
default:
CCLOG(@”received unknown packet type %i”, packet->type);
break;
}
}
[/cc]
Requirements & Setup
You need:
- 2 devices which are Game Center capable, eg they must have the Game Center App installed. If it isn’t, that device is not ready for Game Center. 1st & 2nd Generation devices up to iPhone 3G do not support Game Center. In addition Simulator will not work due to Matchmaking/Invites not being supported on the Simulator.
- 2 Game Center accounts (you can create dummy accounts via the Game Center App)
What you have to do:
- Create a new App on iTunes Connect, enable Game Center for that App, and replace the Bundle ID of your App with the one in the project’s info.plist. Please refer to the Game Center section in the iTunes Connect documentation.
- Make sure Push Notifications are enabled on all devices via Settings App.
- Run the Game Center App on both devices, login and make sure each device is logged in with a unique account. Then invite the other device’s account as friend and accept the friend request, this makes it easier to join each other’s matches.
- Build the Tilemap16 App and deploy it to both devices. Whenever you make a change to the code, you must deploy the App to both devices again, to make sure they run the same code.
- Run the App on one device, wait for the matchmaking screen to appear. Invite your other device’s friend account to join the match.
- Wait on the other device for the match invite to pop up. Tap Accept. The Tilemap16 game will launch.
- Tap Play Now on the first device once the other player has successfully connected and is ready.
- Move the Ninja on either device and watch it move on the other.
Enjoy!
Chapter 12 - Physics Engines: Box2d & Chipmunk
This chapter gives you an introduction to physics engines and what they can do. Since cocos2d supports two physics engines out of the box, Box2d and Chipmunk, I will explain how to do the same things in both physics engines and I aim to cover at the very least the basic elements like shapes, joints and collisions.
Because choosing either physics engine is often done on subjectively. Some developers may prefer the Object-Oriented C++ nature of Box2d while others may feel more comfortable with the C-based interface of Chipmunk (*). At the very least I want to present both and show their strength and weaknesses by example.
(*) Note: there is an Objective-C binding for Chipmunk made by Howling Moon Software. It’s free to use on Mac OS X and iPhone Simulator but costs $200 per title if you want to publish to the App Store. I believe that most cocos2d developers wouldn’t mind spending up to $30 on a tool or library that is essential, that is why I included Zwoptex and Particle Designer in the book. This product however is in a different ballpark price-wise.
On the other hand, the free Chipmunk SpaceManager also aims to offer better integration with cocos2d-iphone and promises a simplified Objective-C interface. I will have a look at the SpaceManager and then decide whether I’ll discuss it in the book, I say it’s likely. Another physics tool that has gotten some attention is the VertexHelper which I’ll at the very least will refer to.
Summary of working on Chapter 11 - Isometric Tilemaps
Isometric tilemaps rock! That is, if you can get all those nasty issues solved. Even though all the issues like graphics glitches at tile edges, correct z-ordering and the proper blend functions have all been discussed and solved by now, it’s still very challenging to get an isometric tilemap on the screen and a player walking over it, with no glitches at all. I believe this chapter will give a lot more developers the chance to delve into the exciting world of isometric tilemaps. I too learned a lot making this example game, and part of me now wants to write an old-school isometric RPG game. Again. For the n-thousand-th time. Sigh. Some day, some day …
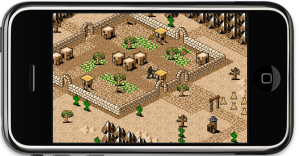 Anyhow, the project I made over the course of this chapter features properly z-ordered tiles and a player sprite, which moves tile-by-tile over the isometric tilemap. You control the player by simply touching in the direction relative to the player that he should move to. One specialty of this project is that the player always remains centered on the screen, he doesn’t move at all! It’s simply the tilemap that is moved under him, which makes a couple things much easier.
Nevertheless you also learn how to find the tile coordinates for a tile that you touch on the screen. And how to avoid the isometric, diamond-shaped tilemap to show the “outside” of the world by adding a border around the tilemap and limiting movement to the playable area. Similarly, the blocking tiles like walls, mountains and houses all block the player’s movement by drawing over the map with a collision layer and a tile whose property is set to “block_movement”.
In the meantime, if you want to gain a better understanding of how isometric tilemaps work, I can recommend the Isometric Projection article by Herbert Glarner. And in case you’re wondering how I suddenly and dramatically increased my art skills, I’ll be honest: I didn’t. I used the terrific tilesets from David E. Gervais which are published under the Creative Commons License. It means you are free to to copy, distribute and transmit those tiles as long as you credit David Gervais as their creator. You can download these tiles from Pousse Rapiere’s website or you can directly download them all at once as 6.4 MB ZIP file here. If you like to hear it from the man, here’s a bit of insight and history from David explaining how these tiles were made.


