Get the latest versions of Kobold2D from the download page and more details in the Release Notes.
Kobold2D v1.1.1 has been updated to include the latest version of cocos2d-iphone v1.1 (beta2b) from May 3rd this year. This version supports the -ipad and -ipadhd suffixes.
Both Kobold2D v1.1.1 and v2.0.1 have been updated to include the latest Chipmunk v6.1.1 and Chipmunk SpaceManager v0.1.3. Although unfortunately SpaceManager still isn’t fully compatible with cocos2d-iphone 2.0 because it still won’t rotate the sprites.
Again both versions include an important fix for KKInput: I’ve received several reports where users complained that KKInput is missing some events. Specifically the “ThisFrame” variants were prone to never fire. This is now fixed.
Line-Drawing Game Starterkit: ARC + cocos2d v1.1 & v2.0
While I’ve been meddling with Kobold2D updates I found this to be the perfect opportunity to update the Line-Drawing Game Starterkit as well. You now get four versions of the project, two are using cocos2d-iphone v1.1 and the other two have been updated to work with cocos2d-iphone v2.0.
And each of the two cocos2d-iphone version projects allows you to choose between the ARC enabled project or the classic manual reference counting project. The included readme document explains this in greater detail. Suffice it to say you can simply choose with which to start: cocos2d v1.1 or v2.0 and either with ARC enabled or manual reference counting.
Of course I strongly recommend the cocos2d-iphone v2.0 version with ARC enabled, seeing how the old devices have an ever diminishing, probably below 15% market share.
And do use ARC, it’s really a no-brainer not to bother with reference counting anymore.
If you’re an existing customer, you should have received an update email with your download link.
This quick comparison sheet gives you all the info to decide whether to use Cocos2D 1.x or Cocos2D 2.x. Contrary to most programs, a higher version number doesn’t infer “better” or “more”. There are pros and cons for both versions.
At the time of this writing the decision really only boils down to whether you want to use shaders and whether you must be able to deploy your app to 1st & 2nd generation devices. See for yourself, it’s that simple:
Cocos2D v1.x(+) compatible with all iOS devices |
Cocos2D v2.x(+) OpenGL ES 2.0 shader programs |
All other differences to this day are minor, and most new features and bugfixes have been migrated back and forth between versions. For beginners I strongly recommend using v1.x as there’s a lot more documentation available for this version. Those who have no interest in writing shader programs can also safely use the v1.x branch without missing out.
Chapter 12 - Physics Engines: Box2d & Chipmunk
This chapter gives you an introduction to physics engines and what they can do. Since cocos2d supports two physics engines out of the box, Box2d and Chipmunk, I will explain how to do the same things in both physics engines and I aim to cover at the very least the basic elements like shapes, joints and collisions.
Because choosing either physics engine is often done on subjectively. Some developers may prefer the Object-Oriented C++ nature of Box2d while others may feel more comfortable with the C-based interface of Chipmunk (*). At the very least I want to present both and show their strength and weaknesses by example.
(*) Note: there is an Objective-C binding for Chipmunk made by Howling Moon Software. It’s free to use on Mac OS X and iPhone Simulator but costs $200 per title if you want to publish to the App Store. I believe that most cocos2d developers wouldn’t mind spending up to $30 on a tool or library that is essential, that is why I included Zwoptex and Particle Designer in the book. This product however is in a different ballpark price-wise.
On the other hand, the free Chipmunk SpaceManager also aims to offer better integration with cocos2d-iphone and promises a simplified Objective-C interface. I will have a look at the SpaceManager and then decide whether I’ll discuss it in the book, I say it’s likely. Another physics tool that has gotten some attention is the VertexHelper which I’ll at the very least will refer to.
Summary of working on Chapter 11 - Isometric Tilemaps
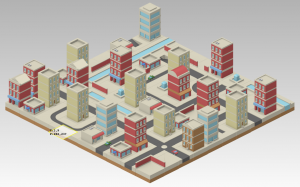
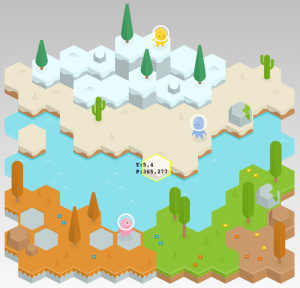
Isometric tilemaps rock! That is, if you can get all those nasty issues solved. Even though all the issues like graphics glitches at tile edges, correct z-ordering and the proper blend functions have all been discussed and solved by now, it’s still very challenging to get an isometric tilemap on the screen and a player walking over it, with no glitches at all. I believe this chapter will give a lot more developers the chance to delve into the exciting world of isometric tilemaps. I too learned a lot making this example game, and part of me now wants to write an old-school isometric RPG game. Again. For the n-thousand-th time. Sigh. Some day, some day …
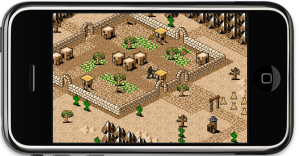 Anyhow, the project I made over the course of this chapter features properly z-ordered tiles and a player sprite, which moves tile-by-tile over the isometric tilemap. You control the player by simply touching in the direction relative to the player that he should move to. One specialty of this project is that the player always remains centered on the screen, he doesn’t move at all! It’s simply the tilemap that is moved under him, which makes a couple things much easier.
Nevertheless you also learn how to find the tile coordinates for a tile that you touch on the screen. And how to avoid the isometric, diamond-shaped tilemap to show the “outside” of the world by adding a border around the tilemap and limiting movement to the playable area. Similarly, the blocking tiles like walls, mountains and houses all block the player’s movement by drawing over the map with a collision layer and a tile whose property is set to “block_movement”.
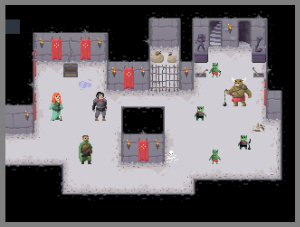
In the meantime, if you want to gain a better understanding of how isometric tilemaps work, I can recommend the Isometric Projection article by Herbert Glarner. And in case you’re wondering how I suddenly and dramatically increased my art skills, I’ll be honest: I didn’t. I used the terrific tilesets from David E. Gervais which are published under the Creative Commons License. It means you are free to to copy, distribute and transmit those tiles as long as you credit David Gervais as their creator. You can download these tiles from Pousse Rapiere’s website or you can directly download them all at once as 6.4 MB ZIP file here. If you like to hear it from the man, here’s a bit of insight and history from David explaining how these tiles were made.


