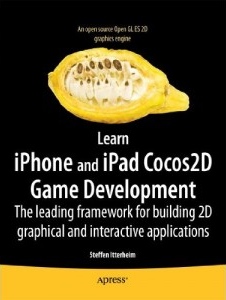
Scheduled for release on November 7th, 2011. Continue reading »
For the second edition of the Learn Cocos2D book I compiled an alphabetically sorted list of tools that developers can use for cocos2d projects. Please let me know if there’s a tool missing from this list or if there’s one that won’t work anymore and hasn’t been updated in months.
The following tools can be used for development with cocos2d:
Bitmap Font Tools
BMFont (Windows)
Fonteditor
Glyph Designer
bmGlyph
Hiero
LabelAtlasCreator
Particle Editing Tools
ParticleCreator
Particle Designer
Physics Editing Tools
Mekanimo
PhysicsBench
PhysicsEditor
VertexHelper
Scene Editing Tools
CocosBuilder
Cocoshop
LevelHelper
Texture Atlas Tools
DarkFunction Editor
SpriteHelper
TexturePacker
Zwoptex
Tilemap Editing Tools
The latest Cocos2D Podcast has been out for a few days and I totally forgot to post it!
Mohammad Azam and I talked with Michael Daley, author of the Learning iOS Game Programming book and one half of the 71Squared development team. You know, the guys who made Particle Designer and Glyph Designer.
Today I’d like to present you a long post made by Markus Nigrin about How to spice up your Game with Particle Effects. He talks about how to use particle effects in your Cocos2D game to, well, great effect. Of course he is using Particle Designer, and he was amazed how few people at the 360iDev event knew about PD. So I thought it can’t hurt to mention it one more time.
Markus’ blog is generally well worth taking some time and digging deeper. He has a post on adding a “News” text (or image) into your game and what effect it can have for marketing and how he got back into programming after 15 years of being a manager, and partially inspired by Ray Wenderlich‘s iPhone Programming 101 class held at 360iDev.
Back on the topic of particle effects, I recently created a very simple but very effective snow storm effect. You can check it out in Particle Designer’s shared effects list (it’s called “SnowStorm”) or download the SnowStorm effect in the Cocos2D plist format. There’s also a shared “PeeFX” effect that I created, subtitled “stream of urine”. Those are from a project I’m currently working on. Hmmm … pee and snow?
Keep guessing. 😉
Add your link to the Cocos2D Linkvent Calendar
Do you have something to share with the Cocos2D community? I haven’t received enough submissions to fill all the days until Xmas, although I do have enough links to post one each day, I’d rather post a link to your website or blog post.
The previously command-line-only TexturePacker tool now has a nice GUI. It’s called the “Pro” version and for a reason. So far, I’ve been using Zwoptex for creating Texture Atlases, but I’ll certainly give TexturePacker Pro a try.
At first glance, what I liked was that it told me when the Texture Atlas was “full”, eg. not all sprites could fit into that Texture Atlas. And the always present list of image filenames on the right side is a welcome feature. Although Zwoptex does have this list as well, it’s almost rendered useless because it’s a seperate view option.
Zwoptex’ price has changed since I checked last time, it’s now at only $14.95. TexturePacker Pro costs $17.95, it’s command line version $9.95 and the upgrade from command line to Pro is $7,95, so you’re saving a whopping $0.05! 
A couple words on pricing
I find both tools are underselling themselves. Zwoptex was initially at $24.95 and even that price seemed “cheap” to me, given how much trouble it saved me and how much faster and more memory efficient it made my projects. I would say that a price range of $30 to $50 would be more than fair for those tools. I can imagine that the TexturePacker command line version at $9.95 and now the Pro version probably forced Zwoptex to adjust its price.
Problem is: this isn’t a market where people choose their tool based on a $3 price difference. Also, it decreases margins for upgrade prices, with TexturePacker upgrade already below $10. Those low-end prices incur a proportionally large amount of transaction fees, paid to the eCommerce vendor, making them less viable. Since this is also not a mass market, but a niche, it would be wiser if both upgraded their prices back to reasonable regions, around or above $30.
Likewise, Particle Designer is also absolutely undervalued at $7.99. Those low prices undercut the value in tools, and make tool development less and less attractive than it already is. And if anything, cocos2d and the other engines need one thing above all else: tools. And good ones!
Be it Ricardos mysterious “world editor” or the Physics + Tilemap IDE (website) or the other game editing tools currently being worked on - if any one of them is being released as a commercial product but sold for less than $30, I’m going to be very mad at you! If it’s less than $60 I’ll still be mad at you, not very, but still mad.
Rant
Seriously, this isn’t the App Store! It’s developers you’re selling to, and they do value useful tools. Just because cocos2d is free doesn’t mean that all tools surrounding it need to be cheap (or free for that matter). Take Sprite Manager 2 for example. It sells for $75 (per seat!) and isn’t all that different from Zwoptex or TexturePacker Pro. If it were a standalone app it would probably pale in comparison! You might argue that SM2 is for Unity, and their developers are less price sensitive - I don’t think so, and some are even more price sensitive because they just made that huge investment in the first place.
In general you could say that those developers who invest several hundred $$ into a game engine (and toolset) are simply more serious about game development. You do have those enthusiasts working with cocos2d as well, but they’re probably outnumbered by a lot of hobbyists and “I’ll give it a try” kind of people who simply join because of the fun involved, and because the only investment in cocos2d is time and they got plenty of that. The question is: do you want to be kind to the hobbyists, or do you want to build a sustainable business? Plus, Zwoptex and Texturer Packer are also being used by Corona developers.
Now you may also be arguing that a cheaper price allows more developers to enjoy the tools and we’re a friendly bunch and not a commercial, greedy corporation. Sure. But those prices do devalue everyone’s tools, so if anyone wanted to build a tool that takes maybe not just 1-2 months to build (initially), but maybe 4-6 months or more before it’s going to be useful, those price points are not very encouraging to start such a project. That doesn’t mean it won’t happen, but I do know that those people who could pull this off, are generally terrible at doing business. And easily influenced by comparable prices, punching a few numbers, and then getting on with their next train of thought which probably involves solving an obscure programming problem.
And the kind of tool that needs this time investment is the one I’ve been looking forward to since I first started working with cocos2d in May 2009. Back at the time I was convinced that by the end of 2009 cocos2d would be having a game editor or at least something to build the GUI and screens with. I wished for a fully-fledged, professional game level editor, with a physics editor, sprite animation builder, asset management, and whatever else you can dream of.
Now, if that ever happened, it shouldn’t cost less than $100. If you can provide killer features like Box2D integration or scripting game logic, ask twice as much. And offer Lite and Pro versions with a variety of feature sets to make the most out of what developers need and what they are willing to pay extra for niche, but very useful features if you need them.
Chapter 12 - Physics Engines: Box2d & Chipmunk
This chapter gives you an introduction to physics engines and what they can do. Since cocos2d supports two physics engines out of the box, Box2d and Chipmunk, I will explain how to do the same things in both physics engines and I aim to cover at the very least the basic elements like shapes, joints and collisions.
Because choosing either physics engine is often done on subjectively. Some developers may prefer the Object-Oriented C++ nature of Box2d while others may feel more comfortable with the C-based interface of Chipmunk (*). At the very least I want to present both and show their strength and weaknesses by example.
(*) Note: there is an Objective-C binding for Chipmunk made by Howling Moon Software. It’s free to use on Mac OS X and iPhone Simulator but costs $200 per title if you want to publish to the App Store. I believe that most cocos2d developers wouldn’t mind spending up to $30 on a tool or library that is essential, that is why I included Zwoptex and Particle Designer in the book. This product however is in a different ballpark price-wise.
On the other hand, the free Chipmunk SpaceManager also aims to offer better integration with cocos2d-iphone and promises a simplified Objective-C interface. I will have a look at the SpaceManager and then decide whether I’ll discuss it in the book, I say it’s likely. Another physics tool that has gotten some attention is the VertexHelper which I’ll at the very least will refer to.
Summary of working on Chapter 11 - Isometric Tilemaps
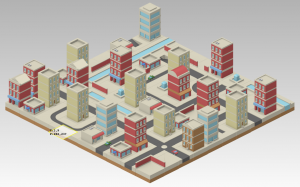
Isometric tilemaps rock! That is, if you can get all those nasty issues solved. Even though all the issues like graphics glitches at tile edges, correct z-ordering and the proper blend functions have all been discussed and solved by now, it’s still very challenging to get an isometric tilemap on the screen and a player walking over it, with no glitches at all. I believe this chapter will give a lot more developers the chance to delve into the exciting world of isometric tilemaps. I too learned a lot making this example game, and part of me now wants to write an old-school isometric RPG game. Again. For the n-thousand-th time. Sigh. Some day, some day …
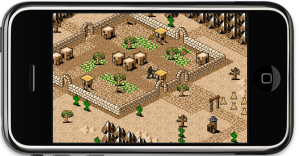 Anyhow, the project I made over the course of this chapter features properly z-ordered tiles and a player sprite, which moves tile-by-tile over the isometric tilemap. You control the player by simply touching in the direction relative to the player that he should move to. One specialty of this project is that the player always remains centered on the screen, he doesn’t move at all! It’s simply the tilemap that is moved under him, which makes a couple things much easier.
Nevertheless you also learn how to find the tile coordinates for a tile that you touch on the screen. And how to avoid the isometric, diamond-shaped tilemap to show the “outside” of the world by adding a border around the tilemap and limiting movement to the playable area. Similarly, the blocking tiles like walls, mountains and houses all block the player’s movement by drawing over the map with a collision layer and a tile whose property is set to “block_movement”.
In the meantime, if you want to gain a better understanding of how isometric tilemaps work, I can recommend the Isometric Projection article by Herbert Glarner. And in case you’re wondering how I suddenly and dramatically increased my art skills, I’ll be honest: I didn’t. I used the terrific tilesets from David E. Gervais which are published under the Creative Commons License. It means you are free to to copy, distribute and transmit those tiles as long as you credit David Gervais as their creator. You can download these tiles from Pousse Rapiere’s website or you can directly download them all at once as 6.4 MB ZIP file here. If you like to hear it from the man, here’s a bit of insight and history from David explaining how these tiles were made.
Chapter 10 - Working with Tilemaps
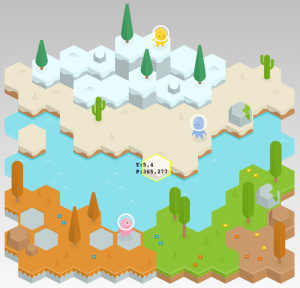
This chapter dives into the depths of the CCTMXTileMap class and how to create, iterate and modify tilemaps in code, including isometric and hexagonal tilemaps. Of course there will be an introduction to the Tiled Map Editor as its the primary tool to create TMX tilemaps that cocos2d supports.
The chapter 11 will then use this newfound information and I’ll walk you through making a scrolling tilemap game, since simply loading, modifying and displaying a tilemap would just be half the story.
Summary of working on Chapter 9 - Particle Effects
This chapter was fun. Particle effects are fun indeed. That is, unless you need to tweak them in code only. I did do that an did my best to describe what each CCParticleSystem property does to a visual effect, although some things you’ll have to see for yourself. You’ll find a lot of detailed information on how to setup or simply modify a particle system in code and a couple tips for designing good particle effects.
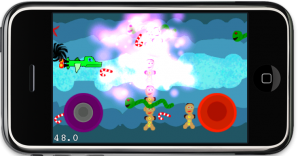 Of course with Particle Designer everything changes. Designing a cool particle effect suddenly goes from a treadmill to a mesmerizing activity that you can waste countless hours on. If you check Particle Designer’s Online Library you’ll find four of the Particle Effects that I designed and submitted, starting with the “Colorful Burst” effect. Have a look!
Obviously these cool effects needed to go somewhere, so I added them to the Shoot ’em Up game as you can see in the screenshot (the boss just exploded into purple smudge). Along the way you learn how to load the particle effects created by Particle Designer of course.


