Don’t multiply velocity/position changes with delta time! End of story.

Okay, not quite. There’s a rationale that goes with it. And there are situations where applying delta time is important, if not required - but probably not in the way you’ve been taught by tutorials and fellow developers.

This is important stuff because applying delta time wrongly makes for a bad game experience.

What is this delta time thing anyway?

If you integrate velocity to a node’s position every frame, you have the option to multiply that velocity with the delta time passed in the update: method. Delta time is simply the time difference between the previous and the current frame.

Actually that is not entirely accurate - delta time is the time difference between the last and current execution of the update: method. This usually occurs every frame, but doesn’t have to be. On a scheduled selector that runs every second, the delta time is - tadaa - one second.

Okay, not even that is accurate. On a scheduled selector that runs every second, delta time is at least one second. It could be slightly more. This can depend on the resolution of the timer and how well one second divides with the time allocated to render a frame, or (as you’ll see later) whether time delta was calculated with the same means as the screen refresh rate.

What does multiplying with delta time do?

The effect of (not) multiplying a node’s velocity with delta time is as follows, assuming that 60 fps is the maximum achievable framerate as on iOS:

  • Don’t multiply with time delta: the node slows down as the framerate drops below 60 fps.
  • Multiply with time delta: the node moves the same distance regardless of the framerate.

Multiplying with delta time is often referred to as “framerate independent” (updates, movement, gameplay, etc). In contrast not multiplying with time delta is often called “framerate dependent” (updates, movement, gameplay, etc).

Unfortunately, framerate independent updates are said to be “important” and often taught by fellow game developers without actually teaching the implications, drawbacks and situations where you don’t want to apply delta time. Here’s one key point to take away early:

Applying delta time only makes a difference when the framerate drops below 60 fps.

If your game always runs at 60 fps there’s absolutely no point to multiply with time delta. If time delta is only used to combat the effect of short-lasting framerate drops, possibly introduced by system events, you’re doing it wrong.

In this case, and most others too, you’re almost always better off not applying delta time on iOS. And if you do, there’s a whole set of things to consider, including the architecture of both the game and the engine.

Continue reading »

The Starting Point for a Train Game with Freeform Tracks

On July 12, 2012, in idevblogaday, by Steffen Itterheim

If you ever wanted to build your own 2D top-down view train driving game, here’s … well, the things you need to consider plus a rudimentary source code example. Because a train following tracks is not as simple as it might seem, unless you restrict curves and switches to 90° angles and allow only very short cars and locomotives.

Here’s a video of my example project. Any stuttering is due to the screen recording software taking a toll on my system combined with the video playback framerate not rendering 60 fps (I assume it’s the standard 24 or 30 fps for Youtube videos). The video shows a sequence of three runs with a medium curve radius, a large curve radius and a ridiculously small curve radius. The yellow line indicates the track being followed by the axles, the purple line indicates the car chassis position (center point between axles).

Continue reading »

cocos2d Book, Chapter 9: Particle Effects

On August 21, 2010, in Announcements, book, cocos2d, by Steffen Itterheim

Chapter 9 - Particle Effects

Those tiny specks which you can see on your touchscreen after a sneeze.

Not exactly. Of course I mean the cocos2d particle system and its built-in particle effects which will be the focus of this chapter. And no discussion of particles would be complete without describing the workflow revolving around the Particle Designer tool.

Summary of working on Chapter 8 - Shoot ’em Up

This certainly wasn’t the easiest chapter for me to write. I had very ambitious goals, maybe too ambitious for 27 pages. I did manage to sneak in quite a lot though, here’s a partial list:

  • how to refactor existing code to make it work better with the new features
  • how to pool bullets and enemies together for easier access and better performance
  • how to not use too many subclasses, instead relying on type switches
  • how to use cocos2d’s node hierarchy as a simple component system for writing reusable game logic components
  • how to implement basic movement, shooting and a healthbar as components
  • how to detect collisions between bullets and enemies

The not so easy part was striking the right balance. Not going too technical. Not doing too much at once. Not dividing things into too many tiny pieces. But most of all I frequently encountered various bugs in the code, or just unexpected behavior of cocos2d which forced me to spend more time debugging and sometimes backtracking changes than I was prepared for.

After a long and hard work week, paired with physical exhaustion and an late-summer allergy burst, my concentration didn’t allow me to work at 100% capacity. In the end I did manage but it took longer than I had planned, I’m over a day late to submit this chapter. The next one will be easier though, and it has to be as I’m preparing for a short trip near the end of next week. I certainly am looking forward to a couple days off now. :)

cocos2d Book, Chapter 8: Shoot ’em Up

On August 14, 2010, in book, cocos2d, by Steffen Itterheim

Chapter 8 - Shoot ’em Up

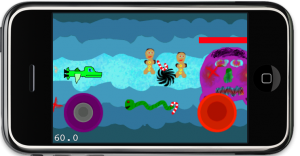
This chapter will finish the shoot ’em up game. There will be enemies and powerups. It raises the issue of good code design when certain things like shooting and moving are common to all objects while other things such as what to shoot and where from and to depend on who is shooting. And then to determine who is hit by whose bullets.

Of course no shoot ’em up game is complete with a boss monster that takes a couple hits to kill. So it’ll need a healthbar. At the end of the chapter this shoot’ em up should be a fully playable game, with Chapter 9 complementing it with visual effects by using the cocos2d particle system. But I’m getting ahead of myself here.

Summary of working on Chapter 7 - Scrolling With Joy

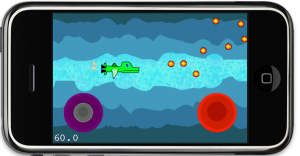
Once again I renamed the chapter a bit since it’s divided into two parts: a parallax, infinitely scrolling background and input via SneakyInput, featuring a fire button and an analog thumbstick respectively at the end changed to a 8-way digital pad.

The parallax scrolling background consists of several bands or stripes which were created on different layers each in Seashore and then saved as individual 480×320 images. They were then added to the Texture Atlas by Zwoptex. The cool thing about this is that Zwoptex preserves the original image’s size while stripping away all transparent parts. So the images take up little space in the Texture Atlas but in game you don’t have to position them individually, you’ll simply place them at the center of the screen.

To achieve the endless scrolling effect two of each image where added side-by-side to each other, with one flipped on the X axis so the images align neatly. Whenever one image has scrolled outside the screen it is moved back to the right side of the screen. At the end I also fixed the vertical flicker lines which can appear due to round-off errors when moving the sprites. And of course they all are drawn with a CCSpriteBatchNode.

The SneakyInput fire button allows continuous shooting and faster shooting when you just tap it, while the thumb stick controls the ship’s movement in both analog and digital (8-way) variants. The Ship class’ setPosition method is overridden to keep the player’s ship within screen boundaries at all times. Finally an extension class gives SneakyInput the same autorelease initializers used by cocos2d, and adds another good example of just how useful Objective-C categories can be.