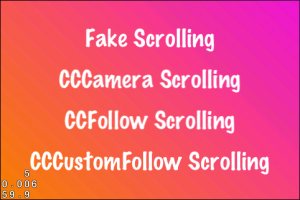
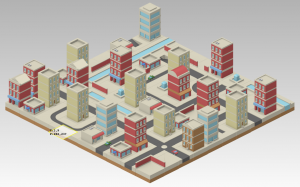
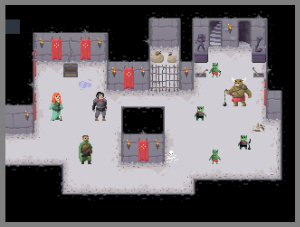
I already blogged about scaling node positions with display resolution. This feature is now built into KoboldTouch. Time for a demonstration before I get back to work on an improved Tilemap renderer:
The cool thing about KoboldTouch autoscaling is that it works transparently. Your nodes will be positioned relative to the design resolution, for example 480×320. The nodes will continue to use the same position on any device! So you just develop these nodes’ positions and their movement as if they were always on a 480×320 device. It’s that simple.
It also works for movement of any kind, be it CCMove* actions or manually updating the position property every frame. Moving nodes continue to move seemlessly even when you rotate the device. Continue reading »
Here’s a quick tip on how to design your scenes so that they scale up to higher resolution displays. For example when your app runs on a widescreen iPhone / iPod touch or on an iPad. This article is not about Retina displays, which use the same coordinate system and merely display higher resolution images.
Design for the lowest supported resolution
First, design your game to the lowest device/window resolution that your app supports. In most cases this will be the 480×320 points used by the majority of iPhones.
Contrary to images, you always want to scale your designed screen layouts up and never down. This is because upscaled screens will always fit on the device’s display, with more or less additional spacing between the nodes. Downscaling however might cause screen elements to overlap, which is hard to fix if you don’t see the overlap in the resolution you design for.
It’s also easier to make manual changes to upscaled screen layouts than it is for downscaled screen layouts.
Calculate the scaling factor
By dividing the current device/window size with the resolution you designed for, you get the scaling factor by which you have to multiply positions. This is a simple wrapper you can use:
|
1 2 3 4 5 6 7 8 9 |
static CGSize designSize = {480, 320}; -(CGPoint) scalePoint:(CGPoint)point { CGSize winSize = [CCDirector sharedDirector].winSize; CGSize scaleFactor = CGSizeMake(winSize.width / designSize.width, winSize.height / designSize.height); return CGPointMake(point.x * scaleFactor.width, point.y * scaleFactor.height); } |
To make a node’s position resolution independent, use the position you would use for a 480×320 screen and scale it up:
|
1 2 |
// centers the sprite, regardless of window size sprite.position = [self scalePoint:CGPointMake(240, 160)]; |
This even works for autorotation. If you use NSNotificationCenter to receive orientation change events, you can use the scalePoint method with the current position to generate the node’s position after the rotation happened. You can try by simply changing the designSize to {320, 480} and setting the app’s default orientation to Portrait.
Caveats
Of course it’s entirely up to you what makes sense, which nodes can be scaled and which should not. For example squeezing a landscape app in portrait mode is possible, but it simply won’t make for a good user experience. However scaling HUD elements that should be aligned with one side of the screen so that they automatically stick to the side of the screen (ie widescreen iPhones, iPad) would be a huge timesaver.
If you update your node’s positions manually in order to move them, then you may have to also scale the amount by which the node moves. It’s easy to do by multiplying the movement vector with the same scale factor.
This won’t work well for actions, which may run faster (or sometimes even slower) depending on window size and aspect ratio. But it’ll work with actions nonetheless if you also apply the scale factor to the target position.
Another issue to watch out for is to accidentally scale up a position, and then scale it up again. This can happen if you’re not careful when updating more complex algorithms or dependencies where more than one method updates the node’s position. The best way to avoid that is to ignore scaling until just before the screen is drawn. You could override the draw or visit method (don’t forget to call super) and scale the position:
|
1 |
self.position = [self scalePoint:self.position]; |
After drawing is complete you could then reset the position back to its original by dividing by the scale factor. I’ll leave it up to you to add a convenience method for that. That would make the position scaling completely transparent to your app and you could simply consider all screens to be in the designed for resolution.
KoboldTouch
I will be adding a KTAutoscaleController to KoboldTouch soon to make this easier for KT users. This will be a really nice feature to have, and really easy to use:
|
1 2 3 4 5 6 7 |
KTAutoscaleController* autoscaleController = [KTAutoscaleController controller]; autoscaleController.designResolution = CGSizeMake(480.0f, 320.0f); [self addSubController:autoscaleController]; // autoscale this sprite's position depending on window size [autoscaleController autoscaleNode:sprite scaledProperties:KTAutoscalePropertyPosition]; |
Until next year, have an enjoyable year’s end!
I’m currently completing one last contract project. One of the last things I had to deal with was to optimize the game’s memory usage.
In today’s iDevBlogADay article I’ll explain how I was able to cut down memory usage by about 25-30 MB (down to 90-95 MB, ie fixing memory warning related crashes) as well as reducing the size of the app bundle from around 25 MB to below 20 MB (which would have been more awesome if Apple hadn’t already increased the over-the-air download limit from 20 MB to 50 MB some time ago).
I’ll also explain how to animate the loading screen while you’re loading resource files, and I’ll add some best practices and common wisdom too.
What’s using 90% of the memory?
Take a guess.
In almost all cases, it’s textures that consume most of the app’s memory. So textures is where you look to optimize first and foremost if you’re having memory warning troubles.
Avoid loading PNG/JPG Textures one after another
The problem with texture loading in cocos2d is that it happens in two steps: first, a UIImage is created from the image file. Then a CCTexture2D object is created from that UIImage. This means while a texture is being loaded, it will consume twice as much memory for a short time period.
The problem used to be so bad that if you loaded 4 textures one after another in the same method, at the end of the method each texture would still consume twice as much memory as it ought to, probably because of the way autorelease works.
I’m not sure if this is still the case, or whether this only applies to manual reference counting but not ARC. I made it a habit to load textures in sequence, waiting at least one frame before trying to load another. This will allow any texture loading overhead to be released from memory. Besides, as you’ll see later, if you want to load textures and other assets in the background this asset-load-sequencing is something you’ll do anyway.
For the past two weeks I’ve been running a Cocos2D Developer Survey. As of today, 236 developers started the survey and 189 finished it completely. That’s 80% despite the many questions they had to answer.
Here are the results with my observations. I started the survey also to see if I was on track with KoboldTouch, and whether certain assumptions hold true. Specifically I had a hunch that cross-platform development is only perceived to have great value or appeal. Let’s see if I was right.
Click on each image for full resolution.
Who are you?
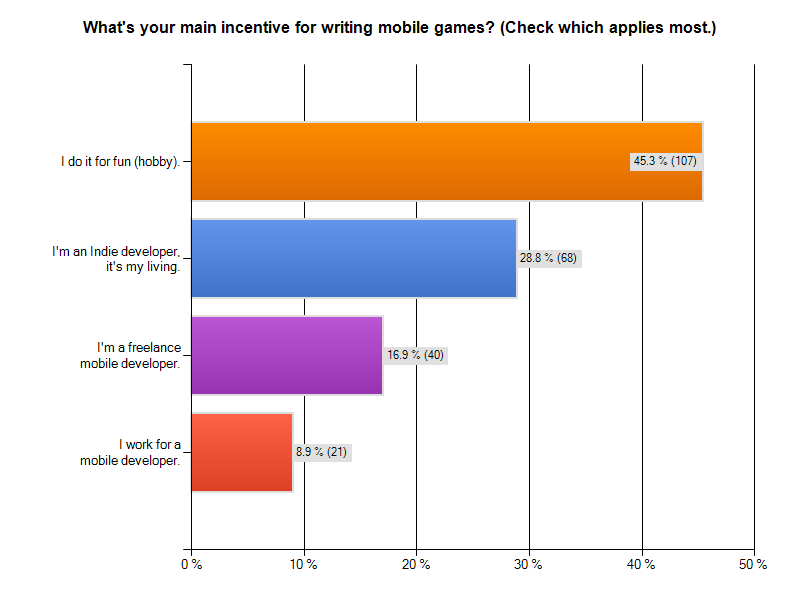
I was very curious how many cocos2d developers consider themselves to be hobbyists and indies compared to professionals, who either work for a mobile developer or are taking on freelance jobs as one.
Almost half of those who answered the survey are hobbyists. Nearly 30% consider themselves indies who make a living making mobile games. This is great! Continue reading »
It’s hard to find the right words to describe the launch of KoboldTouch. I can’t think of anything else but WOW! right now. 
I can’t wait to hear what you have to say about KoboldTouch, and then act on your feedback.
For those who were just waiting for the launch:
Sign up on the KoboldTouch product page to get access to KoboldTouch and Essential Cocos2D.
The rest of this post is a summary of what I wrote before on these two-products-in-one. Actually, I think of KoboldTouch & Essential Cocos2D as being much more a service than products. And it’s a full time commitment from myself.
This calls for music! 
Since I started working on KoboldTouch a couple things fell into place. Mainly that it would:
Provide what Cocos2D leaves up to its users. Fixes what Cocos2D does badly. Adds what Cocos2D doesn’t do at all. Eases development with Cocos2D and accommodates actual developer needs.
While Cocos2D is moving towards cross-platform with their Javascript API, KoboldTouch will focus on adding & improving game design features.
I have a hunch most Cocos2D developers have better iOS/Mac integration and game-specific features higher up on their wish list than cross-platform. Most of you are indies, hobbyists, pragmatists and Apple enthusiasts without the need or resources to do cross-platform development.
UPDATE: KoboldTouch is now available!
KoboldTouch: Spiritual Successor
I first started working on KoboldTouch a few weeks back. I initially undersold it as a “MVC wrapper for Cocos2D”. With what I have in mind spiritual successor of Cocos2D is more like it.
It’s going to be a framework to program iOS & Mac games in, where best practices evolve naturally, where Cocoa programmers feel right at home, where beginners are not left in a void * EXC_BAD_ACCESS … and where Cocos2D is still at the heart of it.
KoboldTouch takes control over Cocos2D, to allows users to implement best practices naturally. Cocos2D provides the view, KoboldTouch provides the controllers, models and the framework to write your code in.


