


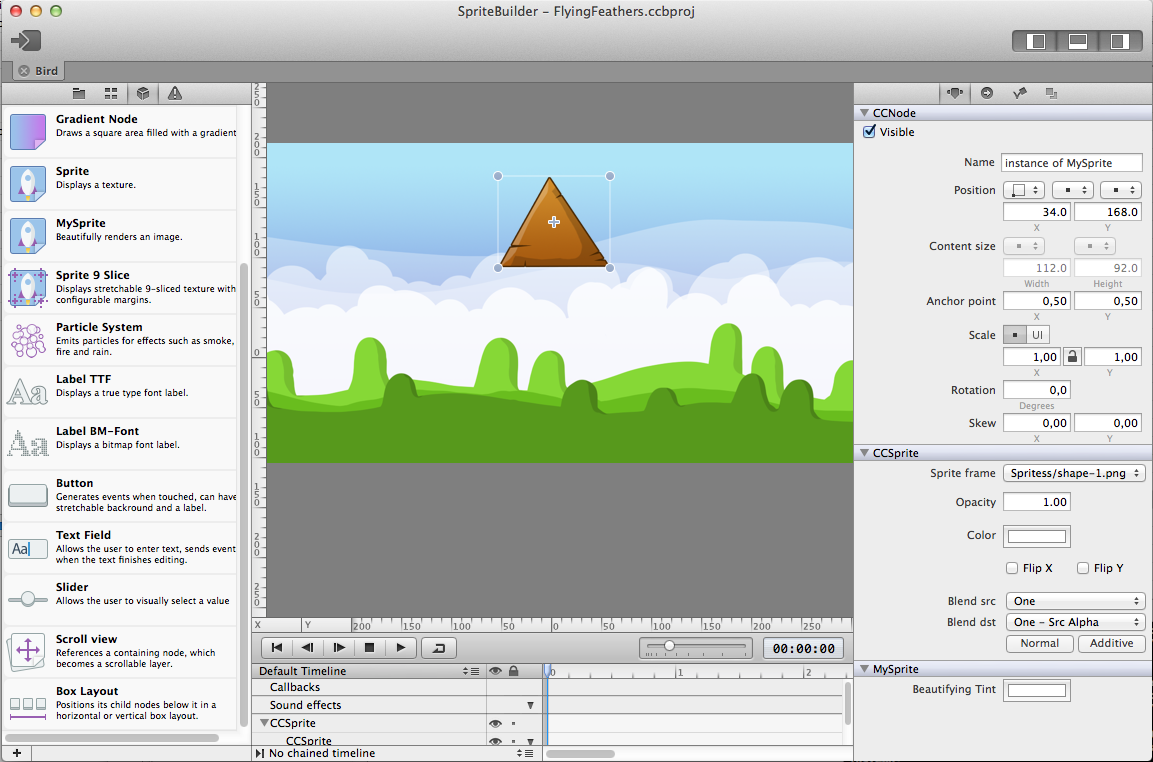
Custom-built SpriteBuilder with MySprite node plugin
Following the recent release of SpriteBuilder and cocos2d-iphone v3 I’m sure some of you are itching to use SpriteBuilder by building the github version in Xcode rather than downloading it from the Mac App Store. Here’s how!
This is a post for developers who want to compile the SpriteBuilder code from github. To customize it, to debug issues, to add or gain access to new features; be it for their own use or to help the project, or both.
Previous experience with Xcode, Objective-C, cocos2d-iphone, git and github is assumed.
Download SpriteBuilder from github
The download and first-time compilation procedure is also detailed on the SpriteBuilder github page. You need to clone the project, then initialize the cocos2d-iphone submodule. The necessary Terminal commands are as follows:
I got a lot of questions in the past why I’m not contributing my work to the cocos2d-iphone project.
One of the obvious reasons being that what I did is simply too radical technically and I don’t want to compromise. Another reason being a fundamental difference in attitude towards developing and managing open and closed source projects.
These questions made me wonder - in particular because there was often a notion associated with these questions: because I do so much with cocos2d-iphone I should somehow be obliged to contribute back to it. Weird, right? I am contributing a lot already, just not code to the repository.
So if I don’t contribute (code), why don’t you? Or generally speaking, why aren’t we all contributing more (code) to open source projects?
I have been using open source software for as long as I can remember doing programming work. Yet I’ve probably contributed no more than a few dozen lines to all projects together. And realizing this it’s easy to see that this is the case for 99.9% of the developers out there.
So why aren’t we contributing more to open source projects? What is stopping us? I’ll give you some probable causes and ideas how to improve it for your own open source project. Continue reading »
 There are many Cocos2D + Storyboard tutorials, it’s about time to do another one that’s done right. Also, this one’s backwards: we’ll start with a Cocos2D template and then add Storyboards to it. The tutorial will work for existing Cocos2D projects to which you wish to add Storyboards, too!
I’ll show you how to add Storyboards to a Cocos2D v2.1 project, with ARC enabled of course. This approach will take a little more work, but the solution will be complete and you gain a fair understanding of how things work together. Plus two custom but reusable View and Navigation controller classes, and I’ll show you what changes you need to make to the AppDelegate.
The resulting project will work with iOS 5 and iOS 6 and autorotation. The navigation and cocos view controllers are separated, and you will be able to subclass them for code customizations as is customary in Cocoa. Cool? Cool, cool, cool!
As usual you can grab the example project (Cocos2D + Box2D + Storyboards with ARC enabled) from github. I’ll also be adding a Storyboards template project to KoboldTouch in the next update, and document what’s special about the KoboldTouch solution.
Oh, only one thing … this tutorial is part of Essential Cocos2D. Head on over and enjoy!

Example ARC project. Pretty awesome.
Therefore I decided to enable ARC in all twelve standard cocos2d Xcode project templates for both cocos2d versions (v1.1 and v2.0), both platforms (iOS and Mac OS), both physics engines (Box2D and Chipmunk) and publish them on github.
You can download the ARC-enabled cocos2d template projects either as ZIP file or TAR file.
 2")
Time to add another project to my github repository. This time I’m answering the frequently asked question (in some form or another) how to zoom in on a particular node. For example zooming in on the player when he dies.
That’s not as trivial as it sounds, but you can make it easy if you follow some guidelines.
First, you want to put all nodes that should be affected by the zoom in the same layer. Then you should avoid changing the position or anchorpoint of the layer - if you still want to change the position of the layer I suggest to add this layer into another, toplevel layer and then only change the position of the toplevel layer. Use the cocos2d node hierarchy to your advantage. And don’t use the CCCamera.
The behavior of this example project is best observed with your own eyes. You can get the ZoomInOnMe project on github.
After a holiday-season hiatus (Happy New Year btw!) LearnCocosTV is back. This episode is somewhat shorter because I had a lot of catching up to do and a lot of chores which aren’t exactly show-worthy. But I did manage to port most of the Kobold2D projects to Cocos2D 2.0 beta. Too bad they look just the same as before.
A bi-weekly Show & Tell about Cocos2D, Kobold2D and iOS/OSX development by Steffen Itterheim.
Episode #3 - Two And A Half Nuts
• Updating Kobold2D to use Cocos2D v2.0 (beta)
• iDevBlogADay: Tips for updating to Cocos2D v2.0
• iDevBlogADay Source Code available on github


