Don’t multiply velocity/position changes with delta time! End of story.
Okay, not quite. There’s a rationale that goes with it. And there are situations where applying delta time is important, if not required - but probably not in the way you’ve been taught by tutorials and fellow developers.
This is important stuff because applying delta time wrongly makes for a bad game experience.
What is this delta time thing anyway?
If you integrate velocity to a node’s position every frame, you have the option to multiply that velocity with the delta time passed in the update: method. Delta time is simply the time difference between the previous and the current frame.
Actually that is not entirely accurate - delta time is the time difference between the last and current execution of the update: method. This usually occurs every frame, but doesn’t have to be. On a scheduled selector that runs every second, the delta time is - tadaa - one second.
Okay, not even that is accurate. On a scheduled selector that runs every second, delta time is at least one second. It could be slightly more. This can depend on the resolution of the timer and how well one second divides with the time allocated to render a frame, or (as you’ll see later) whether time delta was calculated with the same means as the screen refresh rate.
What does multiplying with delta time do?
The effect of (not) multiplying a node’s velocity with delta time is as follows, assuming that 60 fps is the maximum achievable framerate as on iOS:
- Don’t multiply with time delta: the node slows down as the framerate drops below 60 fps.
- Multiply with time delta: the node moves the same distance regardless of the framerate.
Multiplying with delta time is often referred to as “framerate independent” (updates, movement, gameplay, etc). In contrast not multiplying with time delta is often called “framerate dependent” (updates, movement, gameplay, etc).
Unfortunately, framerate independent updates are said to be “important” and often taught by fellow game developers without actually teaching the implications, drawbacks and situations where you don’t want to apply delta time. Here’s one key point to take away early:
Applying delta time only makes a difference when the framerate drops below 60 fps.
If your game always runs at 60 fps there’s absolutely no point to multiply with time delta. If time delta is only used to combat the effect of short-lasting framerate drops, possibly introduced by system events, you’re doing it wrong.
In this case, and most others too, you’re almost always better off not applying delta time on iOS. And if you do, there’s a whole set of things to consider, including the architecture of both the game and the engine.
Continue reading »
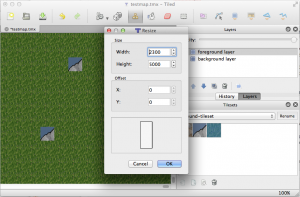
 I’m currently working on a new tilemap renderer for KoboldTouch.
I now have an early version that’s fairly complete and does most of what cocos2d’s tilemap renderer can do. Pun intended: yes, cocos2d’s tilemap renderer really doesn’t do all that much: load and display tilemaps with multiple layers.
In fact my current implementation is one step ahead already:
KoboldTouch’s tilemap renderer doesn’t require you to use -hd/-ipad/-ipadhd TMX files and the related (often hard to use or buggy/broken) TMX scaling tools. Just use the same TMX file designed for standard resolution, then simply provide just the tileset images in the various sizes with the corresponding -hd/-ipad/-ipadhd suffixes. The tilemap looks the same on a Retina device, just with more image detail.
Performance Comparison
Anyhow, I thought I’ll do some quick performance tests. I have a test map with 2 layers and a tiny tileset (3 tiles, 40×40 points). I’m comparing both in the same KoboldTouch project, using the slim MVC wrapper (named KTLegacyTilemapViewController) for cocos2d’s tilemap renderer CCTMXTiledMap. Continue reading »
I updated the Cocos2D Webcam Viewer project from a previous article to download a file from the web asynchronously, and then load its texture asynchronously as well. You can now switch between the two modes to see how asynchronous operations almost completely removed the pauses the app experiences in synchronous mode. Just tap the screen to switch modes.
Continue reading » To visualize the lag I added a constantly moving sprite at the bottom. This makes the lag easier to spot than a framerate counter. I also removed all error checking code from this article to make the code easier to read. As always you can find the Cocos2D Webcam Viewer source code with full error checking on the LearnCocos2D github repository.
While writing the Learn Cocos2D book I was surprised to find that Cocos2D’s CCSpriteBatchNode was only able to increase the performance of several hundred bullet sprites on screen by about 10-15% (20 to 22.5 fps). I wanted to re-visit that scenario for a long time because as far as I understood, the more sprites I was drawing the greater the impact of CCSpriteBatchNode should be.
But even Cocos2D’s own sprite performance tests (compare columns 9 and 10) revealed a performance difference of under 20% (39 to 42 fps). It’s only when all sprites are scaled and rotated, or most of them are outside the screen area, that sprite batching seems to have a bigger impact (25 to 60 fps). Surely that scenario is not applicable to most games. So I started investigating.
Have a look at the following code, and then answer these questions before reading on:
- Which function will run faster?
- What will be the framerate for each function when run 100 times per frame on an iPhone 3G?
- Will wrapping the 100 calls to function1 in an NSAutoreleasePool show any difference?
[cc lang=”ObjC” height=”465″]
-(void) function1
{
CGPoint pos = [self position];
id x = [NSNumber numberWithFloat:pos.x];
id y = [NSNumber numberWithFloat:pos.y];
id objects = [NSArray arrayWithObjects:x, y, nil];
id keys = [NSArray arrayWithObjects:@”x”, @”y”, nil];
id dict = [NSDictionary dictionaryWithObjects:objects forKeys:keys];
dict; // avoid compiler warning, is a noop
}
-(void) function2
{
CGPoint pos = [self position];
id x = [[NSNumber alloc] initWithFloat:pos.x];
id y = [[NSNumber alloc] initWithFloat:pos.y];
id objects = [[NSArray alloc] initWithObjects:x, y, nil];
id keys = [[NSArray alloc] initWithObjects:@”x”, @”y”, nil];
id dict = [[NSDictionary alloc] initWithObjects:objects forKeys:keys];
[x release];
[y release];
[objects release];
[keys release];
[dict release];
}
[/cc]
The Answers
- Which function will run faster? Answer: function1
- What will be the framerate for each function when run 100 times per frame on an iPhone 3G? Answer: 27 fps for function1 and 24 fps for function2.
- Will wrapping the 100 calls to function1 in an NSAutoreleasePool show any difference? Answer: no, but memory of temporary objects is released immediately.
Needless to say, on an iPod (4th Generation) and an iPad these tests all run at 60 fps and give no indication whatsoever that the performance on an iPhone 3G would suffer this much (and neither does the Simulator, of course). All the more reason to test early and often on older devices.
To autorelease or not?
Common wisdom may tell you that alloc/release is faster than autorelease. Even Apple recommends avoiding autorelease, right?
Not quite, because this is often misunderstood: Apple recommends to avoid autorelease but only for functions which create a lot of temporary objects and because of the constrained memory - not because it’s slow or even dangerous - autorelease is not dangerous.
Since memory is so constrained on 1st and 2nd generation iOS devices, it’s best to release that memory as soon as possible and don’t leave it allocated for longer than necessary. To achieve this, you can choose to do two things in this case: use alloc/release or enclose the loop in an NSAutoreleasePool. The latter option is preferred since it will release the memory right away, and not some time later. And autorelease is generally preferable because you will never, ever forget to send a release message to an object - which means it’ll be leaked and forever use up memory.
You can write well-performing, even better-performing code by using autorelease and using NSAutoreleasePool around tight loops creating many temporary autorelease objects.
Innocent looking code kills framerate
Did you expect that creating 100 rather simple NSDictionary instances each frame would drag the framerate down to around 24-27 fps? Me neither. I knew the code wasn’t going to be blazing fast, but I never expected it to have such an impact. However, it can be optimized somewhat since I’m unnecessarily creating two NSArray instances to hold the keys and values respectively before using them to create the NSDictionary. In fact we can get rid of them by using dictionaryWithObjectsAndKeys and doing this in a single step:
[cc lang=”ObjC”]
-(void) function1Optimized
{
CGPoint pos = [self position];
id x = [NSNumber numberWithFloat:pos.x];
id y = [NSNumber numberWithFloat:pos.y];
id dict = [NSDictionary dictionaryWithObjectsAndKeys:x, @”x”, y, @”y”, nil];
dict; // avoid compiler warning, is a noop
}
[/cc]
Sometimes it helps to look around what other ways there are to run the same code. In terms of performance this is an order of a magnitude faster and now clocks in at 42 fps. Still not good enough for realtime rendering obviously but an improvement of over 50% by cutting two NSArray allocations is a very simple and effective optimization.
Just as a general guideline, when I get rid of the two NSNumber instances and simply pass empty strings for x and y the framerate went back up to 60 fps. Of course that’s over-optimizing to the point where the code doesn’t work anymore. It just goes to show how expensive the creation of NSDictionary and NSArray are, as is wrapping simple types in NSNumber or NSValue objects.
If you can avoid allocation and temporary objects, avoid it. If you can’t, at least avoid creating temporary objects every frame. Re-use objects as much as possible. Unfortunately, that’s not an option for NSNumber objects since you can’t change the value of a NSNumber instance.


