


There are two classes of scrolling, "fake" and "real".
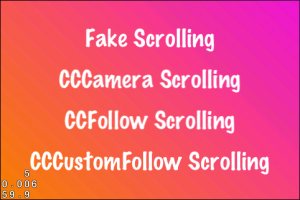
Altogether there are four ways to create a scrolling view in Cocos2D: with CCCamera, with CCFollow, manually moving a layer and "faking it".
I’ll discuss each approach and show their advantages and disadvantages as well as point out for which types of games they work best.
The example projects for this article can be downloaded from github.
Fake Scrolling - Creating the Illusion of Movement
Ideal for "endless scrolling" games. Typical genres include jumping or running games like Doodle Jump and Canabalt, as well as shoot’em ups.
These games mainly scroll along one axis, often scrolling only in one direction. The other axis has a limited range or is not scrolled at all. The fake scrolling approach prevents the coordinates of game objects to "explode" to similarly infinite coordinate points. This could introduce rounding errors in floating point values which may accumulate over time, causing inaccuracies at later stages of the game.
To create the illusion of scrolling, at least two background image sprites are needed. Four are needed if you also want to scroll a little along the minor scrolling axis. The background images must be repeating seamlessly, and each must be at least the size of the screen. The trick is to use the two or four images and move them in the opposite direction of where the player is supposedly heading. Continue reading »
Without further ado:
Download Kobold2D Preview 4
Enjoy it!
The Most Important Changes & Additions: Continue reading »
I needed a way to clip the contents of a node to a specific area of the screen. The goal was to create a scrollable list of items and clipping the items at the top and bottom as they are being scrolled up and down on the screen. The list is of course longer than the screen is high. While you can achieve the same effect by drawing a sprite on top of the scrolling view, I was looking for a cleaner, more flexible and faster solution.
That’s where the glScissor command comes into play. Unfortunately the coordinates are always assuming portrait mode, so you have to rotate them to be able to use Cocos2D coordinates with glScissor. I did some research and found the solution for transforming glScissor coordinates but the rest of that code is too verbose (eg 9 lines instead of the 3 lines needed to transform the Landscape coordinates) and inefficient by needlessly transforming the coordinates every frame.
So I ended up making my own subclass of CCNode called ClippingNode whose children are only drawn within the clippingRegion CGRect (it’s in points). It takes into consideration device rotation and only adjusts the coordinates when either the device rotation changes (name:UIDeviceOrientationDidChangeNotification) or whenever the clippingRegion is updated. In addition the node sets its position at the lower left corner of the clipping region with the contentSize set to the clippingRegion size. By doing so children of the ClippingNode can access the clipping region without having to know that the parent is a ClippingNode class.
To use the ClippingNode, simply add it to your scene hierarchy, then add all other nodes (sprites, labels, etc.) which you want to clip to the ClippingNode. The ClippingNode children will only be drawn with whatever parts are inside the clippingRegion. All other nodes which you do not want to clip you just add to the scene hierarchy as usual. You can of course use two ClippingNodes side-by-side, for example to create a splitscreen view.
ClippingNode.h
[cc lang=”objc”]
#import
#import “cocos2d.h”
/** Restricts (clips) drawing of all children to a specific region. */
@interface ClippingNode : CCNode
{
CGRect clippingRegionInNodeCoordinates;
CGRect clippingRegion;
}
@property (nonatomic) CGRect clippingRegion;
@end
[/cc]
ClippingNode.m
#import "ClippingNode.h"
@interface ClippingNode (PrivateMethods)
-(void) deviceOrientationChanged:(NSNotification*)notification;
@end
@implementation ClippingNode
-(id) init
{
  if ((self = [super init]))
  {
    // register for device orientation change events
    [[NSNotificationCenter defaultCenter] addObserver:self selector:@selector(deviceOrientationChanged:)
                    name:UIDeviceOrientationDidChangeNotification object:nil];
  }
  return self;
}
-(void) dealloc
{
  [[NSNotificationCenter defaultCenter] removeObserver:self name:UIDeviceOrientationDidChangeNotification object:nil];
  [super dealloc];
}
-(CGRect) clippingRegion
{
  return clippingRegionInNodeCoordinates;
}
-(void) setClippingRegion:(CGRect)region
{
  // keep the original region coordinates in case the user wants them back unchanged
  clippingRegionInNodeCoordinates = region;
  self.position = clippingRegionInNodeCoordinates.origin;
  self.contentSize = clippingRegionInNodeCoordinates.size;
  CCDirector* director = [CCDirector sharedDirector];
  CGSize screenSize = [director winSize];
  // glScissor requires the coordinates to be rotated to portrait mode
  switch (director.deviceOrientation)
  {
    default:
    case kCCDeviceOrientationPortrait:
      // do nothing, coords are already correct
      break;

    case kCCDeviceOrientationPortraitUpsideDown:
      region.origin.x = screenSize.width - region.size.width - region.origin.x;
      region.origin.y = screenSize.height - region.size.height - region.origin.y;
      break;

    case kCCDeviceOrientationLandscapeLeft:
      region.origin = CGPointMake(region.origin.y, screenSize.width - region.size.width - region.origin.x);
      region.size = CGSizeMake(region.size.height, region.size.width);
      break;

    case kCCDeviceOrientationLandscapeRight:
      region.origin = CGPointMake(screenSize.height - region.size.height - region.origin.y, region.origin.x);
      region.size = CGSizeMake(region.size.height, region.size.width);
      break;
  }

  // convert to retina coordinates if needed
  region = CC_RECT_POINTS_TO_PIXELS(region);

  // respect scaling
  clippingRegion = CGRectMake(region.origin.x * scaleX_, region.origin.y * scaleY_,
              region.size.width * scaleX_, region.size.height * scaleY_);
}
-(void) setScale:(float)newScale
{
  [super setScale:newScale];
  // re-adjust the clipping region according to the current scale factor
  [self setClippingRegion:clippingRegionInNodeCoordinates];
}
-(void) deviceOrientationChanged:(NSNotification*)notification
{
  // re-adjust the clipping region according to the current orientation
  [self setClippingRegion:clippingRegionInNodeCoordinates];
}
-(void) visit
{
  glPushMatrix();
  glEnable(GL_SCISSOR_TEST);
  glScissor(clippingRegion.origin.x + positionInPixels_.x, clippingRegion.origin.y + positionInPixels_.y,
      clippingRegion.size.width, clippingRegion.size.height);

  [super visit];

  glDisable(GL_SCISSOR_TEST);
  glPopMatrix();
}
@end


