Chapter 12 - Physics Engines: Box2d & Chipmunk
This chapter gives you an introduction to physics engines and what they can do. Since cocos2d supports two physics engines out of the box, Box2d and Chipmunk, I will explain how to do the same things in both physics engines and I aim to cover at the very least the basic elements like shapes, joints and collisions.
Because choosing either physics engine is often done on subjectively. Some developers may prefer the Object-Oriented C++ nature of Box2d while others may feel more comfortable with the C-based interface of Chipmunk (*). At the very least I want to present both and show their strength and weaknesses by example.
(*) Note: there is an Objective-C binding for Chipmunk made by Howling Moon Software. It’s free to use on Mac OS X and iPhone Simulator but costs $200 per title if you want to publish to the App Store. I believe that most cocos2d developers wouldn’t mind spending up to $30 on a tool or library that is essential, that is why I included Zwoptex and Particle Designer in the book. This product however is in a different ballpark price-wise.
On the other hand, the free Chipmunk SpaceManager also aims to offer better integration with cocos2d-iphone and promises a simplified Objective-C interface. I will have a look at the SpaceManager and then decide whether I’ll discuss it in the book, I say it’s likely. Another physics tool that has gotten some attention is the VertexHelper which I’ll at the very least will refer to.
Summary of working on Chapter 11 - Isometric Tilemaps
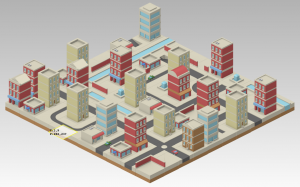
Isometric tilemaps rock! That is, if you can get all those nasty issues solved. Even though all the issues like graphics glitches at tile edges, correct z-ordering and the proper blend functions have all been discussed and solved by now, it’s still very challenging to get an isometric tilemap on the screen and a player walking over it, with no glitches at all. I believe this chapter will give a lot more developers the chance to delve into the exciting world of isometric tilemaps. I too learned a lot making this example game, and part of me now wants to write an old-school isometric RPG game. Again. For the n-thousand-th time. Sigh. Some day, some day …
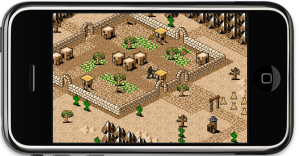 Anyhow, the project I made over the course of this chapter features properly z-ordered tiles and a player sprite, which moves tile-by-tile over the isometric tilemap. You control the player by simply touching in the direction relative to the player that he should move to. One specialty of this project is that the player always remains centered on the screen, he doesn’t move at all! It’s simply the tilemap that is moved under him, which makes a couple things much easier.
Nevertheless you also learn how to find the tile coordinates for a tile that you touch on the screen. And how to avoid the isometric, diamond-shaped tilemap to show the “outside” of the world by adding a border around the tilemap and limiting movement to the playable area. Similarly, the blocking tiles like walls, mountains and houses all block the player’s movement by drawing over the map with a collision layer and a tile whose property is set to “block_movement”.
In the meantime, if you want to gain a better understanding of how isometric tilemaps work, I can recommend the Isometric Projection article by Herbert Glarner. And in case you’re wondering how I suddenly and dramatically increased my art skills, I’ll be honest: I didn’t. I used the terrific tilesets from David E. Gervais which are published under the Creative Commons License. It means you are free to to copy, distribute and transmit those tiles as long as you credit David Gervais as their creator. You can download these tiles from Pousse Rapiere’s website or you can directly download them all at once as 6.4 MB ZIP file here. If you like to hear it from the man, here’s a bit of insight and history from David explaining how these tiles were made.
Chapter 5 - Getting bigger and better
The gist of this chapter will be to discuss the simple game project from the previous chapter. I threw everything into one class, clearly not what you want to do for bigger games. But getting from one-class to real code design is a big step which some hesitate to take. I’ll make that easier and discuss common issues and their solutions, such as what to seperate, what to subclass from and how you can have all the seperated objects communicate with each other and exchange information in various ways.
A big topic will of course be how to take advantage of cocos2d’s scene hierarchy and which pitfalls it may have when moving from a single-layer game to one which has multiple layers and even multiple scenes.
As for the chapter title I’m not so sure if that’ll be it. Maybe along the way while I’m writing I’ll change it. Suggestions welcome!
The chapter will be submitted on Friday, July 30th.
What’s your take on good cocos2d code structure?
Did you ever struggle with cocos2d design concepts? Or the cocos2d scene hierarchy? Or how to layout a scene and divide your game into logical parts? Tell me about it.
I know theses questions are somewhat generic to ask. It’s about the things that don’t feel right but there doesn’t seem to be a better, more obvious way. I think we all know some of those, if you do, be sure to tell me! Leave a comment or write me an email.
Summary of working on Chapter 4 - First simple game
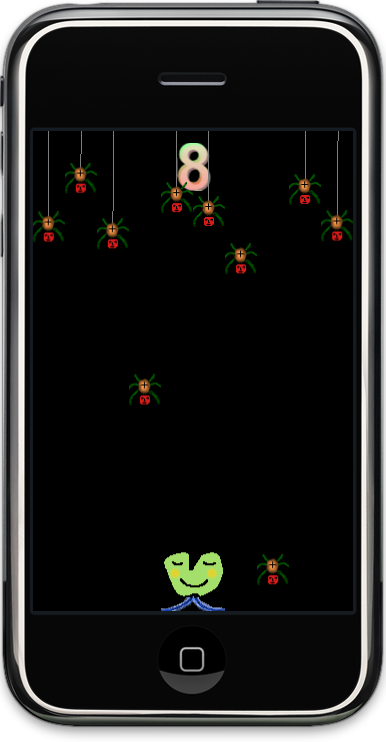 The game I chose to make is called Doodle Drop and features dropping spiders and an accelerometer controlled alien trying to avoid the spiders. All in all it got divided into 8 concrete steps. Lots and lots of code comments, too.
It starts simple enough, adding resources to Xcode and adding sprites. It gets more gameplay-esque when the accelerometer-driven player controls got tweaked to provide acceleration and deceleration of the player object. In contrast, the spiders movements are driven only by actions.
I introduce you to two undocumented features of cocos2d, namely CCArray which is since v0.99.4 used to store all children of a node. The other are the CGPointExtension class which has all the functions normally provided by a physics engine, however not every game should link a physics engine just because one needs those math functions. That’s why CGPointExtension comes in handy.
With the ccpDistance method the collision checks are done. Simple radial collisions, and in debug mode the collision radii are drawn too.
In between the CCLabel for the score got replaced with a CCBitmapFontAtlas, because it killed the framerate. I shortly mentioned Hiero and how to use it in principle but for all the details there was no room. But while I was at it I created the Hiero Tutorial.
At the end of the project I added some polish which isn’t described in the book (too many details) but really adds to the game’s look and feel. The spiders drop, hang in there, then charge before dropping down, all done using actions. I’ve also added the thread they’re hanging from using ccDrawLine. And then there’s a game over label which shows even more action use.
One of the principles I followed is to stay away from fixed coordinates as much as possible. So the project, once finished, did run just fine on an iPad. Although the experience is a different one, there’s more spiders dropping and they drop faster but there’s also more safe space to maneuver to.
Oh and, the game art is all mine. Yes, I know … but Man-Spiders do have just six legs! 


