


A preview version of cocos2d-iphone v3 has been available for a couple days now. I thought I’ll take a closer look and summarize what’s been done, what’s working and what isn’t, what’s new and what’s old but revamped.
Installation
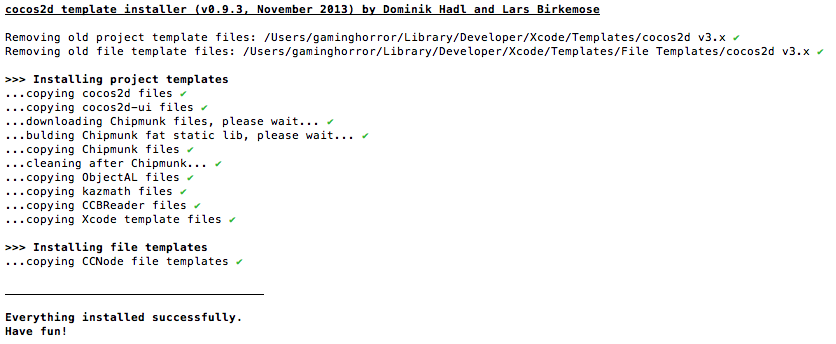 The installer script has been revamped. It has a different name (install.sh) and different parameters (-force instead of -f).
The first thing I noticed is that the installer is downloading Chipmunk2D. Made me wonder why, so I double-checked to confirm: Chipmunk isn’t included in the archive. This means no offline installation.
I’ll explain later why Chipmunk isn’t included.
Project & File Templates
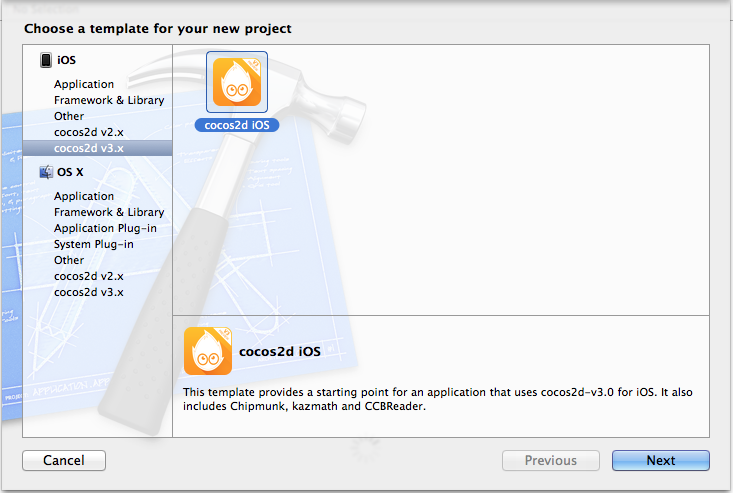
In the preview there’s only one project template. It doesn’t demo any physics features, it’s your typical “Hello World” example with buttons.
There seems to be an issue with the template where any attempt to save it to a custom location caused Xcode to crash. In fact every time the “Save File” sheet came up and I didn’t click on “Create” right away, Xcode would crash. That’s just one of the reasons why it’s still a preview.
The CCNode File Template isn’t worth mentioning at this point, it creates an empty Objective-C class and is barely different from the regular Objective-C class template at this time.
Hello World v3
Continue reading »
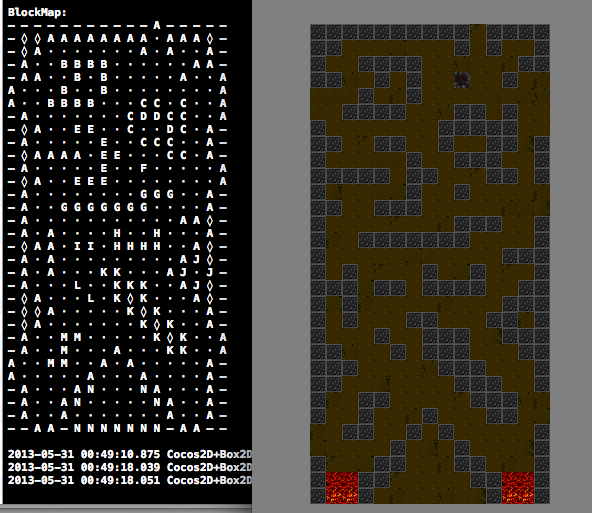 You have a tilemap and you want physics collisions on it? The solution seems obvious: create a rectangle shape for every blocking tile.
But ouch! This solution is not just hugely wasteful and unnecessarily slows down the physics collision code, it also introduces the well known problem of characters getting stuck even on flat surfaces.
This is in particular a problem for Box2D because its collision mechanic doesn’t work well with flat surfaces subdivided into smaller segments (rectangle shapes in this case).
A workable but still very awkward solution to work around this behavior is to create characters with bevelled edges at the character shape’s bottom at the risk of bopping characters as they walk about the map.
Lupines in the Moore Neighborhood
A good solution to generate physics collisions is to implement the Moore Neighborhood algorithm to generate chain shapes which are more suitable for tilemap collisions. The downside is that adding or removing individual blocking tiles at runtime requires updating the shapes - this is not implemented in this project.
Every flat surface, no matter how many tiles form the surface, will then consist of only one straight collision segment. Here’s a quick demo video of the project discussed in this post that shows the algorithm at work and the resulting “game”:
Get the latest versions of Kobold2D from the download page and more details in the Release Notes.
Kobold2D v1.1.1 has been updated to include the latest version of cocos2d-iphone v1.1 (beta2b) from May 3rd this year. This version supports the -ipad and -ipadhd suffixes.
Both Kobold2D v1.1.1 and v2.0.1 have been updated to include the latest Chipmunk v6.1.1 and Chipmunk SpaceManager v0.1.3. Although unfortunately SpaceManager still isn’t fully compatible with cocos2d-iphone 2.0 because it still won’t rotate the sprites.
Again both versions include an important fix for KKInput: I’ve received several reports where users complained that KKInput is missing some events. Specifically the “ThisFrame” variants were prone to never fire. This is now fixed.
Line-Drawing Game Starterkit: ARC + cocos2d v1.1 & v2.0
While I’ve been meddling with Kobold2D updates I found this to be the perfect opportunity to update the Line-Drawing Game Starterkit as well. You now get four versions of the project, two are using cocos2d-iphone v1.1 and the other two have been updated to work with cocos2d-iphone v2.0.
And each of the two cocos2d-iphone version projects allows you to choose between the ARC enabled project or the classic manual reference counting project. The included readme document explains this in greater detail. Suffice it to say you can simply choose with which to start: cocos2d v1.1 or v2.0 and either with ARC enabled or manual reference counting.
Of course I strongly recommend the cocos2d-iphone v2.0 version with ARC enabled, seeing how the old devices have an ever diminishing, probably below 15% market share.
And do use ARC, it’s really a no-brainer not to bother with reference counting anymore.
If you’re an existing customer, you should have received an update email with your download link.
I recorded a screencast to give you a first impression of the current alpha version of Kobold2D. I’ll show you what is is, what it includes (so far) and how it improves the cocos2d development process.
Since recording the screencast I’ve added the Doodle Drop project from the book as an iOS game template project. I also added the Box2D & Chipmunk physics projects from the book and improved them to work on both iOS and Mac OS X.
Update
Here’s a screenshot showing the current list of template projects (Hello Kobold2D, Hello Cocos3D, Hello Cocos2D-X, Physics Box2D, Physics Chipmunk, Physics Chipmunk SpaceManager, Doodle Drop) and the Doodle Drop template running:

Today I completed the first draft of the Kobold2D chapter which will be in the second edition of the Learn Cocos2D book. In that chapter I’m also giving you an introduction to cocos3d, the official 3D add-on library for cocos2d. I ported cocos3d’s Xcode project template to Kobold2D and spiced it up a little with some cocos2d nodes in the back- and foreground:

Notice the “incoming network connection” warning. This is caused by the iSimulate library which is distributed with Kobold2D and activated by default for Simulator builds. You still need to buy the iSimulate App to benefit from it though. If you don’t you can also choose to ignore the dialog or simply disable iSimulate by commenting out a line in the project’s BuildSettings-iOS.xcconfig file.
I’ve also had great fun with the augmented reality option that the cocos3d CCNodeController class provides. And setting it up is one line of code. Here’s the “camera as live background” demo in action:

Since a picture doesn’t really do it justice, here’s a video:
Admittedly it could run a little faster on my iPhone 3G. It’s pretty taxed and averages around 20 fps with the camera background view and rendering a 3D model. My iPod Touch 4 averages at around 40 fps and it feels a lot smoother.
Kobold2D Todo List
One of the biggest items on my todo list for Kobold2D is to design the website and get rid of the “coming soon” page. This includes setting up the wiki and filling it with content, documentation for the most part. And, well, paying $150 each month because I don’t see any alternative to using Confluence. I want to enjoy working on documentation, and I want you to enjoy browsing and reading it.
I also want to create more template projects. Currently, as you can see in the first screenshot, there’s Hello Kobold2D (iOS & Mac), Hello Cocos3D (iOS) and Hello Cocos2D-X (iOS). I want to add two more templates, one for Chipmunk with SpaceManager (iOS & Mac) and one for Box2D (iOS & Mac). I also want to add the projects from my book as project templates, namely Doodle Drop, the Shoot ’em Up game, the Orthogonal and the Isometric Tilemap projects, and the Cocos2D With UIKit project (all iOS).
Even though Kobold2D won’t have Xcode 4 Project Templates I still want to give you a quick and easy way start a new project based on one of the template projects. Notice the distinction between “project template” (those in Xcode’s New Project dialog) and “template project” (a regular, already existing project). I started writing a tool that allows you to create a copy of an existing Kobold2D template project and rename it, so that the workflow is just as convenient as doing it within Xcode. It works for the specific template I tested it with, but I still have to design the user interface and make the code fail-safe.
In case you wonder why Kobold2D won’t have Xcode Project Templates: they are not nearly as powerful as they would have to be. And they’re a pain in the rear to create and maintain without some tool support. But worst of all, you have no way of including files in an Xcode 4 project template that must not be added to the Project Navigator. Like, for example, .xcodeproj files.
Upgrading cocos2d-iphone is a recurring issue for many developers but since it happens so infrequently during the lifecycle of a project, there’s just no routine to follow. Eventually you might want to upgrade cocos2d-iphone, so the question arises: how do you do that with the least amount of trouble?
As I’m going through the process of updating over 70 (!) Xcode projects for the second revision of my Learn Cocos2D book, I thought I should outline the steps to upgrade an existing Xcode 3 project which uses cocos2d-iphone v0.99.x to a Xcode 4 project that uses cocos2d-iphone v1.0.x.
Prerequisites: software update
Obviously, you want to download the latest cocos2d-iphone version and unzip it to any directory. Just remember where you unzipped it because that’s where you’ll copy the new library folders from.
You also want to make sure you’ve upgraded to Xcode 4 by now, by installing the iOS 4.3 (or later) SDK, if you haven’t done so already.
Caution: Make sure Xcode is closed during the first steps.
Step #1: delete libs folder contents
In your project’s folder, in this case DoodleDrop03, select all folders in the libs folder and delete them without mercy:

You’ll end up with an empty libs folder. In other words, don’t delete the libs folder itself or in case you did, make sure you re-create the libs folder.
Caution: The reason why I delete all the libraries in the libs folder instead of simply overwriting the libraries with new ones is simple: you can expect the updated cocos2d-iphone version to have removed or renamed some files. By first deleting all libraries you can be sure that no “zombie files” exist which are no longer used but might still be compiled when you later re-add the libraries. Such zombie files would screw up the build process and generate errors like “Duplicate defined symbols” and other such mishaps.
Step #2: copy the library folders
The first thing you’ll notice when you want to upgrade the libs (Box2D, Chipmunk, cocos2d, CocosDenshion, cocoslive, FontLabel and TouchJSON) is that they’re in different folders in the cocos2d-iphone project that you’ve downloaded and unzipped.
Make sure you select the exact same folders that are selected in the screenshot below:

This difference in folder layout can be a bit confusing. What you need to be aware of is that the Box2D, Chipmunk, FontLabel and TouchJSON folders are in the external folder in the cocos2d-iphone project. Furthermore, the Box2D folder that you should copy is a subfolder of Box2d. Note the difference in capitalization of the letter D. You want to copy the folder with the uppercase D: Box2D. The same goes for the CocosDenshion folder, you should select the CocosDenshion folder inside the CocosDenshion folder.
Caution: Make sure you don’t select the Box2D Testbed folder - if you do and copy that as well, Xcode 4 might lock up building the project, consuming 100% CPU power and requiring a force quit to shut it down.
Note: If you use only Chipmunk or Box2D physics, or neither of them, you can skip copying these folders of course.
To complete the copy opertation, go to the libs folder and paste the copied library folders so that you end up with a libs folder that looks exactly like the image in Step #1.
Tip: If you prefer drag and drop you can just drag the selected folders from one Finder window to another onto your project’s libs folder. This may be easier to do but you should remember to hold down the Option key while dropping so that you actually copy the folders instead of moving them. The copy operation is indicated by the green + icon underneath the cursor as you drag & drop while holding the Option key.
Step #3: Remove Library References
Open your project in Xcode 4 now.
Select all groups under the cocos2d Sources group and hit Backspace to delete these groups (or right-click and choose Delete). You will be prompted with a dialog like in the screenshot below.
Make sure you select the default option Remove References Only to avoid deleting the new library folders you just copied:

Once you’ve removed the libraries groups, the cocos2d Sources group should be completely empty. You just got rid of all the old references, saving yourself from any potential compilation errors caused by references to files which may not exist anymore.
Step #4: Add Library Folders
Next you want to re-add your library folders. Select and right click the cocos2d Sources group and select Add Files to “NameOfYourProject”…:

Browse into the project’s libs folder and select all the library folders that you need in your project.
You may have noticed that my project doesn’t use any physics engine, so I decided to not add them here. If you do use Box2D in your project you would want to also select Box2D of course. Likewise if you use Chipmunk.
Note: While it’s not a problem to add both physics engine folders, doing so might increase your App’s size.
Now, here’s where you need to be careful with the options! You want to make sure they’re set exactly as in the screenshot below. Most importantly, when adding files Xcode will default to add the files to the project’s main target (in this case DoodleDrop) instead of the cocos2d libraries target.
Make sure that only the cocos2d libraries target is selected to avoid any build errors:

Step #5: Build it!
You should now try and build the project. If you’re lucky, there won’t be any errors and you can continue with your work.
But most likely, depending on your project’s complexity and the changes made to cocos2d-iphone, you may have to fix any build errors that occur. Most of them are likely to be caused by classes that have been renamed or functions that have been deprecated. In this case you’ll have to find out through the API Reference and release notes what the changes are and how to fix them.
Fixing the “missing base SDK” message
One common issue that occurs specifically to older projects is the “missing base SDK” error. I think it was the Xcode version introduced with Mac OS X Snow Leopard (released Aug. 28th 2010) that eventually fixed this dreaded issue by adding a “latest iOS” option for the Base SDK Build Setting.
If you see a message like this (especially if it gives you a compile warning or error):
![]()
You should change the Base SDK Build Setting of your project to use the “Latest iOS” setting:

Note: In some cases it may be necessary to close Xcode 4 and re-open it to make the “missing base SDK” message go away.
Correctly Inheriting Build Settings
Normally, all targets in Xcode inherit the Build Settings of the project by default.
However, once you’ve made any change to any Build Setting at the target level this Build Setting will no longer inherit changes made to the same Build Setting on the project level. The default reaction by many developers is often to bite the bullet and check and re-check the Build Settings of the project as well as all targets, and to make the same change as many times as you have targets in your project.
Don’t do that, there’s a better and easier way!
You can have a Build Setting at the target level to default back to inherit the Build Setting defined at the project level. Likewise a Build Setting at the project level can be set to inherit from the OS default setting. In the screenshot below I have purposefully changed the Build Setting at the target level:
![]()
To have it default back to the project setting, which is Latest iOS (iOS 4.3) all you need to do is to select that Build Setting and hit the Delete key:
![]()
Tip: Switching from the Combined to the Levels view when reviewing the Build Settings makes it easy to see which Build Settings are inherited and which aren’t. You’ll also notice that any Build Setting that has been changed at the current level and doesn’t inherit its value anymore is printed in bold letters.
That’s it!
Happy coding with your newly updated cocos2d-iphone project! This upgrade tutorial will also be printed in the second revision of the Learn Cocos2D book.
Tip: With Kobold2D it will be even easier to upgrade your project because a simple copy & paste of the files in the kobold2d folder will suffice. If there are ever any additional steps to follow we’ll describe them in detail of course.


