Due to technical issues (blank page) I had to split the previous article (now focuses only on memory optimization) in two. This is the second part which (mostly) focuses on reducing the app bundle size.
Loading Assets In Sequence
Here’s the code that I use to load textures or other assets asynchronously (in background, on another thread).
Imagine loadAssetsThenGotoMainMenu being a scheduled method that runs every frame or perhaps less often. The assetLoadCount and loadingAsset variables are declared in the @interface as int and BOOL respectively.
|
1 2 3 4 5 6 7 8 9 10 11 12 13 14 15 16 17 18 19 20 21 22 23 24 25 26 27 28 29 30 31 32 33 34 35 36 37 38 39 40 41 42 |
-(void) increaseAssetLoadCount { assetLoadCount++; loadingAsset = NO; } -(void) loadAssetsThenGotoMainMenu:(ccTime)delta { NSLog(@"load assets %i", assetLoadCount); switch (assetLoadCount) { case 0: if (loadingAsset == NO) { loadingAsset = YES; NSLog(@"============= Loading home.png ==============="); [CCTexture2D setDefaultAlphaPixelFormat:kCCTexture2DPixelFormat_RGB5A1]; [[CCTextureCache sharedTextureCache] addImageAsync:@"home.png" target:self selector:@selector(increaseAssetLoadCount)]; } break; case 1: if (loadingAsset == NO) { loadingAsset = YES; [self performSelectorInBackground:@selector(loadSpriteFrames:) withObject:nil]; } break; // extend with more sequentially numbered cases, as needed // the default case runs last, loads the next scene default: { [self unscheduleAllSelectors]; MainMenuScene* mainMenuScene = [MainMenuScene node]; [[CCDirector sharedDirector] replaceScene:mainMenuScene]; } break; } } |
When this method runs the first case statement is executed. To avoid accidentally loading the same image multiple times every time the selector runs, the loadingAsset flag is set to YES. When the texture cache has completed loading this texture, it will call the increaseAssetLoadCount. This then ensures that the next case statement is executed the next time loadAssetsThenGotoMainMenu runs.
The cool thing about this solution is that you can easily add more switch statements to add more textures to load. Because the default case is where the scene changes, and that only happens if there are no more switch cases to process.
Be sure not to skip a number in the switch cases because that will also run the default case.
Decreasing the size of your app
Besides the memory usage advantage, reducing the color bit depth of textures to 16 bit will also significantly reduce their size. But there are other options that will allow you to reduce your app’s size, perhaps significantly.
TexturePacker PNG Optimization
If for some reason you still want to use PNG files instead of the highly recommended .pvr.ccz file format, TexturePacker has a slider named “Png Opt Level” to help reduce the size of PNGs (doesn’t affect loading time though):
As far as I understand it, it tries a given number of optimizations and picks the one that creates the smallest file size. The downside is that the maximum level can take very long for large texture atlases, in some cases 10 to 20 minutes on a Late 2009 27″ iMac. The task is multi-threaded, so it should be a lot faster on quad core systems.
Fortunately there’s really no need to do this unless you’re ready to release the app. Question is, how much can it reduce the size of PNG files? Continue reading »
I’m currently completing one last contract project. One of the last things I had to deal with was to optimize the game’s memory usage.
In today’s iDevBlogADay article I’ll explain how I was able to cut down memory usage by about 25-30 MB (down to 90-95 MB, ie fixing memory warning related crashes) as well as reducing the size of the app bundle from around 25 MB to below 20 MB (which would have been more awesome if Apple hadn’t already increased the over-the-air download limit from 20 MB to 50 MB some time ago).
I’ll also explain how to animate the loading screen while you’re loading resource files, and I’ll add some best practices and common wisdom too.
What’s using 90% of the memory?
Take a guess.
In almost all cases, it’s textures that consume most of the app’s memory. So textures is where you look to optimize first and foremost if you’re having memory warning troubles.
Avoid loading PNG/JPG Textures one after another
The problem with texture loading in cocos2d is that it happens in two steps: first, a UIImage is created from the image file. Then a CCTexture2D object is created from that UIImage. This means while a texture is being loaded, it will consume twice as much memory for a short time period.
The problem used to be so bad that if you loaded 4 textures one after another in the same method, at the end of the method each texture would still consume twice as much memory as it ought to, probably because of the way autorelease works.
I’m not sure if this is still the case, or whether this only applies to manual reference counting but not ARC. I made it a habit to load textures in sequence, waiting at least one frame before trying to load another. This will allow any texture loading overhead to be released from memory. Besides, as you’ll see later, if you want to load textures and other assets in the background this asset-load-sequencing is something you’ll do anyway.
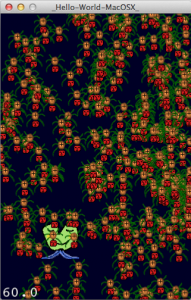 In this episode of LearnCocosTV I demonstrate how to write and animate a Cocos2D scene with KoboldScript.
KoboldScript is more than just writing the same Cocos2D code but with a scripting language. Most other scripting language bindings for game engines simply translate the game engine’s C/C++/Objective-C API 1:1 (more or less) without introducing new concepts, adding more comfort by simplifying common tasks, or utilizing the powerful features of whatever the scripting language has to offer.
KoboldScript goes three steps further than that - one by tightly integrating the setup of scenes via defining the node properties in a tool-friendly tree structure (Lua table) that you can both write manually or create programmatically using Lua’s built-in features.
Two, by using Statemachines to drive game logic while also providing free Lua scripting via user-specified Lua callback functions. And three, by adding a (MVC-ish) component system with re-usable abilities and behaviors to all Cocos2D nodes.
Unfortunately I ran out of time at the end so I couldn’t even say goodbye. I hope you don’t mind. 
Episode #6 - One Small Script for Man …
• KoboldScript Demonstration
o How to create Scenes with Sprites, etc
o How Abilities & Behaviors work
• iDevBlogADay: Asynchronous Texture Loading
o Cocos2D Webcam Viewer speedup
I updated the Cocos2D Webcam Viewer project from a previous article to download a file from the web asynchronously, and then load its texture asynchronously as well. You can now switch between the two modes to see how asynchronous operations almost completely removed the pauses the app experiences in synchronous mode. Just tap the screen to switch modes.
Continue reading » To visualize the lag I added a constantly moving sprite at the bottom. This makes the lag easier to spot than a framerate counter. I also removed all error checking code from this article to make the code easier to read. As always you can find the Cocos2D Webcam Viewer source code with full error checking on the LearnCocos2D github repository.


