Cocos2D’s CCRenderTexture class is shrouded in mysteries. Part of it because it has a low-level aura to it, and most certainly because it simply works differently than most Cocos2D nodes. In this tutorial you’ll learn all about CCRenderTexture and what you can use it for.
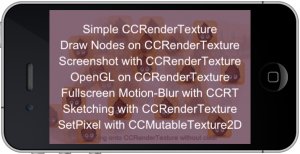 The CCRenderTexture demo project will guide you through basic uses of CCRenderTexture with 6 examples, including taking a screenshot, drawing with your fingers and applying full-screen motion blur.
As a bonus I’ve also added an example for CCMutableTexture2D (aka CCTexture2DMutable) that shows how you can set pixels in a mutable texture.
- How to create a CCRenderTexture
- How to render nodes onto a CCRenderTexture
- How to draw OpenGL stuff on CCRenderTexture
- How to create sprites from a CCRenderTexture
- How to create screenshots with CCRenderTexture
- Drawing / Sketching with CCRenderTexture
- Fullscreen Motion-Blur with CCRenderTexture
- Set pixels with CCTexture2DMutable aka CCMutableTexture2D
- The CCRenderTexture demo project
How to create a CCRenderTexture
Creating a CCRenderTexture is just as easy as creating any other CCNode. You only need to specify the texture’s width and height and set the position of the render texture. Since CCRenderTexture inherits from CCNode you can then just add it as child:
[cc lang=”cpp”]
CCRenderTexture* rtx = [CCRenderTexture renderTextureWithWidth:256
height:256];
rtx.position = CGPointMake(240, 160);
[self addChild:rtx z:0 tag:1];
[/cc]
The texture size can be any size, it does not have to be power of two. Of course, the device may create a texture that is power of two, so the same caution applies as for any texture. For example, if the texture size is 130×260 the internal texture will have a size of 256×512 - the next higher power of two dimensions. The texture will use more memory accordingly.
You can also specify an optional texture pixel format
[cc lang=”cpp”]
CCRenderTexture* rtx = [CCRenderTexture
renderTextureWithWidth:200
height:200
pixelFormat:kCCTexture2DPixelFormat_RGBA4444];
rtx.position = CGPointMake(240, 160);
[self addChild:rtx z:0 tag:1];
[/cc]
Following is a list of supported texture pixel formats. Most notably you can not create PVR or 8-Bit render textures, only the uncompressed 16-Bit and 32-Bit textures. Attempting to create a render texture with a different pixel format than these leads to a crash.
[cc lang=”cpp”]
kCCTexture2DPixelFormat_RGBA8888 // 32-Bit: 888 bits RGB, 8 bits alpha
kCCTexture2DPixelFormat_RGBA4444 // 16-Bit: 444 bits RGB, 4 bits alpha
kCCTexture2DPixelFormat_RGB5A1 // 16-Bit: 555 bits RGB, 1 bit alpha
kCCTexture2DPixelFormat_RGB565 // 16-Bit: 565 bits RGB, no alpha
[/cc]
By default the newly created render texture is fully transparent, so you won’t see anything. The easiest way to do something with the render texture is to clear the entire texture with a color. In this case with completely random values between 0.0f to 1.0f:
[cc lang=”cpp”]
[rtx clear:CCRANDOM_0_1()
g:CCRANDOM_0_1()
b:CCRANDOM_0_1()
a:CCRANDOM_0_1()];
[/cc]
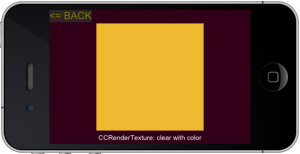
Imagine!
No, actually you don’t have to. There’s an example image with a random clear color to the right. Just look! ======>>
How to render nodes onto a CCRenderTexture
Obviously you’ll want to do more with your render texture, like drawing nodes (sprites, labels, particle effects, etc) onto the texture. Drawing onto a render texture can happen in any method, it doesn’t have to be done in the draw method. But rendering does have to happen between the calls to the render texture’s begin and end methods.
For begin there is also beginWithClear which clears the entire texture with a uniform color and alpha value. Clearing is recommended unless you want a caleidoscope effect. Any CCNode can be drawn onto the texture simply by sending the node the visit message which will draw it:
[cc lang=”cpp”]
[rtx beginWithClear:1 g:1 b:1 a:CCRANDOM_0_1()];
// send “visit” to the nodes that should be rendered
[someNode visit];
[rtx end];
[/cc]
Keep in mind that the visit message draws the node, not the draw method. If you have a node that does custom drawing in its draw method, and you want to render that node onto a render texture, you will have to move the drawing code from the draw method to the visit method.
Let’s create and draw a sprite onto the render texture. Note that it is wasteful to create a new sprite every time you draw onto a render texture, in particular if you update the render texture often (several times per second). In that case you would want to cache the nodes you’re drawing.
[cc lang=”cpp”]
[rtx beginWithClear:1 g:1 b:1 a:CCRANDOM_0_1()];
CCSprite* icon = [CCSprite spriteWithFile:@”Icon.png”];
// the node’s 0,0 position is at the lower-left corner of rtx
// this centers the node on the render texture:
icon.position =
CGPointMake(rtx.sprite.contentSize.width * rtx.sprite.anchorPoint.x,
rtx.sprite.contentSize.height * rtx.sprite.anchorPoint.y);
// visit will render the sprite
[icon visit];
[rtx end];
[/cc]
There are several important points to take away from this. First, since the render texture is already a child of our scene, the nodes rendered onto the render texture don’t necessarily have to be children as well. By manually sending the node the visit method, it gets drawn onto the render texture. Normally this happens automatically if the node is added as a child to the scene hierarchy. By not adding it, we can draw the node manually onto the render texture but it won’t be drawn anytime or anywhere else.
We also made use of the render texture’s sprite. The sprite property is the sprite the render texture adds to itself to display the texture. The render texture itself behaves like a standard CCNode. This means that the render texture’s contentSize and anchorPoint will be 0,0 - so if you need to make use of these you will have to take them from the render texture’s sprite instead.
Moving on, you can actually send the visit message more than once to each node. That way you can render the same sprite with different properties, like changes in color, position, rotation or texture filtering:
[cc lang=”cpp”]
…
// visit will render the sprite we created above
[icon visit];
// render the same sprite again, with different properties
icon.color = ccc3(255, 200, 100);
icon.rotation = -70;
icon.scale = 4;
icon.position = CGPointMake(-45, 135);
// turn off filtering
[icon.texture setAliasTexParameters];
// render sprite without filtering
[icon visit];
// turn filtering back on
[icon.texture setAntiAliasTexParameters];
[/cc]
You can even use different blend functions for each node that you send visit to. Ray Wenderlich has an example for this use case in his Sprite Masking tutorial.
How to draw OpenGL stuff on CCRenderTexture
This one is easy to answer. Just as you send the visit message to nodes, you can also call any OpenGL drawing commands in between the begin and end methods of the render texture. Here’s a simple example:
[cc lang=”cpp”]
[rtx beginWithClear:0.0f g:0.0f b:0.0f a:0.0f];
// example of drawing regular OpenGL stuff onto the render texture
glLineWidth(2);
glColor4f(0.6f, 0.0f, 0.0f, 0.4f);
CGSize winSize = [CCDirector sharedDirector].winSize;
for (int i = 0; i < winSize.height; i += 5)
{
ccDrawLine(CGPointMake(0, i), CGPointMake(winSize.width, i));
}
glColor4f(1.0f, 0.0f, 0.0f, 0.5f);
glLineWidth(4);
ccDrawQuadBezier(CGPointZero, CGPointMake(winSize.width, 0),
CGPointMake(winSize.width, winSize.height), 12);
ccDrawQuadBezier(CGPointZero, CGPointMake(0, winSize.height),
CGPointMake(winSize.width, winSize.height), 12);
glColor4f(1.0f, 1.0f, 1.0f, 1.0f);
glLineWidth(1);
[rtx end];
[/cc]
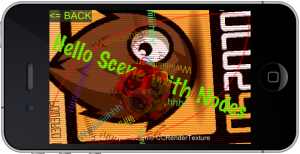 It’s important to stress that you can do this in any method, for example every frame in the update method. You are not forced to render OpenGL commands onto a CCRenderTexture inside the draw method of a node.
To the right you’ll see the result of this code. Just a bunch of lines, more or less. And since this is also often asked: yes, you can draw curved lines with Cocos2D using either ccDrawCubicBezier or ccDrawQuadBezier.
How to create sprites from a CCRenderTexture
You can create one or more CCSprite nodes which use the CCRenderTexture’s sprite texture. The newly created sprites will change whenever you update the render texture. You do not need to create a new render texture for each new sprite, nor do you need to create a new sprite whenever you updated the render texture. I’ve seen this in a couple examples and I believe that some of the “bad render texture performance” issues stem from needlessly re-creating render textures and sprites, instead of re-using the existing ones.
Here’s how you can create a sprite from a CCRenderTexture:
[cc lang=”cpp”]
// create a separate sprite using the rendertexture
// sprite will be updated whenever the rendertexture contents change
CCSprite* rtxSprite = [CCSprite spriteWithTexture:rtx.sprite.texture];
// since the texture is upside down, the sprite needs to be flipped:
rtxSprite.scaleY = -1;
[self addChild:rtxSprite];
[/cc]
A common misconception is that CCRenderTexture derives from CCTexture2D. It does not, therefore you can not create a sprite from a CCRenderTexture object. Instead you will have to use the CCRenderTexture’s sprite.texture to create a new sprite. And since the render texture is upside down, you have to flip the newly created sprite, otherwise it is drawn upside down.
To make your life a bit easier, here’s a CCSprite category that allows you to create a CCSprite directly from a CCRenderTexture. This code is also in the demo project:
[cc lang=”cpp”]
@interface CCSprite (RenderTextureCategory)
+(id) spriteWithRenderTexture:(CCRenderTexture*)rtx;
@end
@implementation CCSprite (RenderTextureCategory)
+(id) spriteWithRenderTexture:(CCRenderTexture*)rtx
{
CCSprite* sprite = [CCSprite spriteWithTexture:rtx.sprite.texture];
sprite.scaleY = -1;
return sprite;
}
@end
[/cc]
![]() If you create a CCSprite from a CCRenderTexture, you may notice that the CCRenderTexture is rendered differently than the CCSprite using the render texture’s texture. This is because the blend modes are different for the CCRenderTexture’s sprite and regular CCSprite objects. This will cause the CCRenderTexture (left) to be rendered opaque, whereas the CCSprite (right) has transparent areas.
If you create a CCSprite from a CCRenderTexture, you may notice that the CCRenderTexture is rendered differently than the CCSprite using the render texture’s texture. This is because the blend modes are different for the CCRenderTexture’s sprite and regular CCSprite objects. This will cause the CCRenderTexture (left) to be rendered opaque, whereas the CCSprite (right) has transparent areas.
How to create screenshots with CCRenderTexture
One of the frequently asked questions is “how to create a screenshot with Cocos2D?”. Various solutions have been created over time, grabbing the OpenGL frame buffer for example. But truly the easiest and most flexible solution is to simply use a CCRenderTexture to take a screenshot. The powerful advantage of CCRenderTexture is that you can skip specific nodes, or only take a screenshot of a specific layer and its children. You also don’t need to worry about saving the screenshot, since CCRenderTexture has can do that with its saveBuffer methods.
The demo project contains a CCScreenshot class that allows you to take a screenshot starting with a specific node. It also wraps the annoying bit of creating a path to the app’s documents folder - the only place where you can save new files on and iOS device:
[cc lang=”cpp”]+(NSString*) screenshotPathForFile:(NSString *)file
{
NSArray* paths = NSSearchPathForDirectoriesInDomains
(NSDocumentDirectory, NSUserDomainMask, YES);
NSString* documentsDirectory = [paths objectAtIndex:0];
NSString* screenshotPath = [documentsDirectory
stringByAppendingPathComponent:file];
return screenshotPath;
}[/cc]
Taking the screenshot itself is dead simple. First, a CCRenderTexture with the size of the screen area is created. We can then just visit the node that was passed to the method. The saveBuffer method then saves the screenshot.
[cc lang=”cpp”]
+(CCRenderTexture*) screenshotWithStartNode:(CCNode*)startNode
filename:(NSString*)filename
{
[CCDirector sharedDirector].nextDeltaTimeZero = YES;
CGSize winSize = [CCDirector sharedDirector].winSize;
CCRenderTexture* rtx =
[CCRenderTexture renderTextureWithWidth:winSize.width
height:winSize.height];
[rtx begin];
[startNode visit];
[rtx end];
// save as file as PNG
[rtx saveBuffer:[self screenshotPathForFile:filename]
format:kCCImageFormatPNG];
return rtx;
}
[/cc]
It is worth mentioning that the render texture is not explicitly cleared. Since it is a newly created render texture, it is already cleared. Calling clear again would be wasteful.
The saveBuffer format is explicitly set to save the file as PNG. The default saveBuffer method without the format parameter should not be used, since it will save the file as JPG. I’ve explained in an earlier blog post why JPGs are the worst possible file format for iOS devices: JPGs are terribly slow to load. PNG is the preferred format. For CCRenderTexture JPG and PNG are the only two format choices.
The screenshot render texture is returned in case you want to immediately create a CCSprite from the render texture. Creating the screenshot is then as simple as calling screenshotWithStartNode with a file name and the appropriate starting node, for example the scene or just one of its layers:
[cc lang=”cpp”][CCScreenshot screenshotWithStartNode:self filename:screenshotFile];
[/cc]
Note that loading the screenshot.png file from disk is slower than creating a new CCSprite from an already existing texture. But if you do load the screenshot file, you should make sure to remove it from the CCTextureCache. The texture cache will only see that you’re trying to load the same file name again. If there’s already a texture in memory with that filename, the updated screenshot.png will not be loaded even though its contents have changed. To allow reloading the screenshot.png file call removeTextureForKey with the full path to the screenshot file:
[cc lang=”cpp”]
// get the full path to the screenshot file
NSString* file = @”screenshot.png”;
NSString* screenshotPath = [CCScreenshot screenshotPathForFile:file];
// the screenshot texture must be removed from the texture cache,
// to force reloading the new one from disk
[[CCTextureCache sharedTextureCache] removeTextureForKey:screenshotPath];
// add the sprite from the newly created screenshot
CCSprite* screenshotSprite = [CCSprite spriteWithFile:screenshotPath];
[/cc]
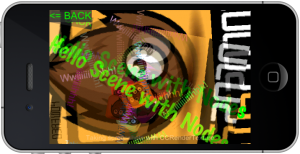 Notice that after saving a CCRenderTexture with saveBuffer as a PNG or JPG file, you no longer have to flip (scaleY = -1) the sprite when you create a new one from the screenshot file.
The screenshot to the right shows a recently taken screenshot drawn over the actual scene, and slowly fading and moving away.
Just don’t expect to create a screenshot, or even just a screen-sized render texture (without saving) without a noticeable performance lag even on the latest devices. This is definitely not something you will want to do while your game is commencing, but it’s perfectly fine to take a screenshot for a savegame or after winning the game, for example.
Drawing / Sketching with CCRenderTexture
This one itches a scratch and etches a sketch. In other words: how to use CCRenderTexture for a drawing or sketching program. The main difference here being that you do not want to clear the render texture every time you begin drawing to it:
[cc lang=”cpp”]
// explicitly don’t clear the rendertexture
[rtx begin];
int color = 0;
for (UITouch* touch in touches)
{
CGPoint touchLocation = [touch locationInView:director.openGLView];
touchLocation = [director convertToGL:touchLocation];
// the location must be converted to the rtx sprite’s node space
touchLocation = [rtx.sprite convertToNodeSpace:touchLocation];
// because the sprite is flipped along its Y axis,
// the Y coordinate must also be flipped:
touchLocation.y = rtx.sprite.contentSize.height - touchLocation.y;
// set the brush at that location and render it
brush.position = touchLocation;
[self setBrushColor:color++];
[brush visit];
}
[rtx end];
[/cc]
Important to consider is the fact that touch locations must be converted to the node space of the render texture’s sprite. Trying to convert the touch location to the render texture’s node space will not give you the correct results. Furthermore, since the sprite’s texture is upside down, the touchLocation.y coordinate must also be inverted so that the origin (0, 0) coordinate is effectively at the upper left corner of the texture.
Another curiosity to some may be how I’m able to iterate over the UITouch objects. It is common practice to “collect” touches in an array or simply by retaining the NSSet. In this case I went with an array. Each new touch is added to the array, and whenever a touch ends it is removed:
[cc lang=”cpp”]
-(BOOL) ccTouchBegan:(UITouch *)touch withEvent:(UIEvent *)event
{
// add new touches to the array as they come in
[touches addObject:touch];
return YES;
}
-(void) ccTouchEnded:(UITouch *)touch withEvent:(UIEvent *)event
{
// must remove the touches that have ended or where cancelled
[touches removeObject:touch];
}
-(void) ccTouchCancelled:(UITouch *)touch withEvent:(UIEvent *)event
{
[self ccTouchEnded:touch withEvent:event];
}
[/cc]
For as long as a finger remains on the screen the corresponding UITouch* object remains in memory and only updates its properties. By iterating over the touches array I can draw nodes at each finger’s location, even when one or more fingers aren’t moving. This allows the sprite that is rendered with very low opacity to become more opaque the longer you keep touching the same location, since rendering the same sprite multiple times without clearing the render texture becomes an additive operation.
 Sketching with a render texture has one significant drawback: you can not undo. What is drawn onto the texture remains forever. You can not take away the most recent, or any, draw commands. You can only clear the entire texture and let the user start over.
Nevertheless, you can achieve some cool results as seen in the screenshot.
Fullscreen Motion-Blur with CCRenderTexture
Once I was able to render the contents of the screen into a separate texture, I had the idea to implement a motion blur effect using CCRenderTexture. The principle is relatively simple:
- Create multiple render textures
- Render the current screen into the “least recently drawn to” render texture
- Draw all render textures with increasing opacity, in the order from least recently drawn to up to the one that was just updated with the contents of the screen
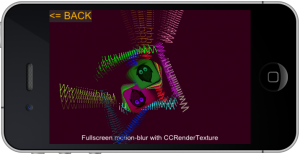 This creates a blur effect by doing nothing more than to add shadow images with increasing transparency. You can see the final effect in the screenshot to the right.
The first task is to create the render textures, by default 4. Any more and the frame rate drops too far, any less and the effect simply as pronounced as I’d like it to be. Since I want the blur effect to render normally with transparency, I’m creating a CCSprite from each render texture and only add the new sprites to the scene’s children list. The render textures are retained in an array instead. To be able to get the corresponding CCSprite from each render texture I also assign the renderSprite to the render texture’s userData property:
[cc lang=”cpp”]
CGSize winSize = [CCDirector sharedDirector].winSize;
renderTextures = [NSMutableArray arrayWithCapacity:kRenderTextureCount];
renderTextures = [renderTextures retain];
for (int i = 0; i < kRenderTextureCount; i++)
{
CCRenderTexture* rtx = [CCRenderTexture
renderTextureWithWidth:winSize.width
height:winSize.height];
rtx.position = CGPointMake(winSize.width / 2, winSize.height / 2);
CCSprite* renderSprite = [CCSprite spriteWithRenderTexture:rtx];
renderSprite.position = rtx.position;
[self addChild:renderSprite z:100 + i];
rtx.userData = renderSprite;
[renderTextures addObject:rtx];
}
[/cc]
Now comes the clever part. Since the scene should be drawn only into a render texture, and then the scene should draw itself from the 4 render texture sprites, I decided to overwrite the visit method and explicitly don't call the super implementation. That allows me to gain control over what is rendered where.
First I start by drawing all the motion-blurred nodes (tag == 10) onto the currently selected render texture. Then I reorder the render textures from least recently drawn to most recently drawn with increasing z order and increasing opacity. At the same time the call to selectNextRenderTexture will also ensure that the next visit will draw to the least recently drawn render texture.
Finally, I simply call visit on any node that doesn't have the tag 10 to render them. This includes the render texture sprites plus any other nodes like labels or the back button.
[cc lang="cpp"]
-(void) visit
{
// force manual drawing by not calling super visit ...
//[super visit];
// render into next rendertexture
CCRenderTexture* rtx = [renderTextures objectAtIndex:
currentRenderTextureIndex];
[rtx beginWithClear:0 g:0 b:0 a:0];
CCNode* node;
CCARRAY_FOREACH([self children], node)
{
if (node.tag == 10)
{
[node visit];
}
}
[rtx end];
// reorder the render textures so that the
// most recently rendered texture is drawn last
[self selectNextRenderTexture];
int index = currentRenderTextureIndex;
for (int i = 0; i < kRenderTextureCount; i++)
{
CCRenderTexture* rtx =
(CCRenderTexture*)[renderTextures objectAtIndex:index];
CCSprite* renderSprite = (CCSprite*)rtx.userData;
renderSprite.opacity = (255.0f / kRenderTextureCount) * (i + 1);
[self reorderChild:renderSprite z:100 + i];
[self selectNextRenderTexture];
index++;
if (index >= kRenderTextureCount) {
index = 0;
}
}
// draw any remaining nodes
CCARRAY_FOREACH([self children], node)
{
if (node.tag != 10)
{
[node visit];
}
}
}
[/cc]
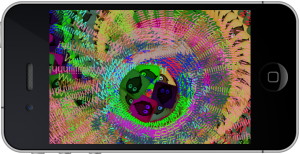 I removed the background image for this demonstration so that the motion blur effect is more noticeable. Just as noticeable however is a drop in performance, for example on an iPod 4 to around 40 fps. This is very likely because of the fact that there are 4 fullscreen textures being rendered.
The motion blur example in the demo project will cycle every 20 seconds from either clearing or not clearing the render textures. In the latter case you can create a caleidoscope-like effect, as seen in the screenshot to the right.
Set pixels with CCTexture2DMutable aka CCMutableTexture2D
Another frequently asked question: How to get/set pixels of a texture with Cocos2D?
There’s a commonly used CCTexture2DMutable class floating around which was initially posted here by Lam Hoang Pham. There are a variety of versions floating around but the most up to date CCTexture2DMutable class (by manucorporat) is here.
With that, you can create a sprite that uses a mutable texture:
[cc lang=”cpp”]
// initialize a mutable texture with a block of memory set to white
CGSize texSize = CGSizeMake(128, 128);
int bytes = texSize.width * texSize.height * 4;
textureData = malloc(bytes);
memset(textureData, INT32_MAX, bytes);
CCMutableTexture2D* tex = [[CCMutableTexture2D alloc]
initWithData:textureData
pixelFormat:kCCTexture2DPixelFormat_RGBA8888
pixelsWide:texSize.width
pixelsHigh:texSize.height
contentSize:texSize];
[tex autorelease];
// disable texture filtering (no smoothing, clear and crisp pixels)
[tex setAliasTexParameters];
sprite = [CCSprite spriteWithTexture:tex];
[/cc]
You can then cast that sprite’s texture to a CCMutableTexture2D and call its setPixelAt method to change the color of the pixel at the given location. When you’re done updating the mutable texture, you also need to call apply so that the changes become visible:
[cc lang=”cpp”]
CCMutableTexture2D* tex = (CCMutableTexture2D*)sprite.texture;
CGPoint randomPos = CGPointMake(rect.size.width * CCRANDOM_0_1(),
rect.size.height * CCRANDOM_0_1());
ccColor4B color = ccc4(CCRANDOM_0_1() * 255, CCRANDOM_0_1() * 255,
CCRANDOM_0_1() * 255, CCRANDOM_0_1() * 255);
[tex setPixelAt:randomPos rgba:color];
[tex apply];
[/cc]
Getting a pixel is done in a similar fashion with pixelAt:
[cc lang=”cpp”]
ccColor4B color = [tex pixelAt:randomPos];
[/cc]
![]() The demo project draws a shifting color to random pixels in the texture. The texture is scaled up and texture filtering is turned off so that the pixels are more easily visible.
The demo project draws a shifting color to random pixels in the texture. The texture is scaled up and texture filtering is turned off so that the pixels are more easily visible.
A mutable CCRenderTexture?
Out of curiosity I did an experiment subclassing CCRenderTexture and modifying the init method so it would use CCTexture2DMutable. While this worked perfectly on the Simulator, it crashes on actual iOS devices. So it seems you can not marry CCRenderTexture and CCTexture2DMutable.
In order to set or change the pixels on a CCRenderTexture you can use regular OpenGL drawing commands, or make use of Cocos2D’s convenience drawing methods like ccDrawPoint.
The CCRenderTexture demo project
Grab it here. This project is also available on my github repository where I host all of the iDevBlogADay source code.
The code is free to use and modify as you please. All of my code is under MIT License, the CCTexture2DMutable has no clearly identifiable license but was said to be usable “as freely as you wish”.
As usual, if you have any questions feel free to ask! And if you enjoyed this post don’t forget to tweet, like or plus-one it, thanks!
| Follow @gaminghorror | Follow @kobold2d |
|





How can this be used?
I’ve got this idea in my head, please correct me where I’m wrong.
Imagine a complex sprite made of repeating patterns positioned to make it meaningful, the base of that pattern is one image that’s repeated all over it.
Could I save memory in the app size by including just that small image as a texture image (let’s say .png) and then use code to distribute it around on a virtual plane, then render that to a CCRenderTexture and then use that CCRenderTexture as a sprite?
Or am I thinking about CCRenderTexture entirely wrongly?
Yes, you can reduce your app size by adding only a small image that is used to render a pattern. However, you don’t need a render texture to render the pattern. If you use a sprite batch you can render that pattern from several sprites using the same image and it’ll be just as fast. You could also use a tilemap to create that pattern. Finally, there’s the GL_REPEAT texture parameter with which you can define an area (rectangle) over which a single texture will be repeated, I suppose that will be the fastest option.
Hi Steffen,
Great article.
Is it possible to use effects like CCLens3D on a sprite in a CCRenderTexture? If so how?
I don’t know but I would assume that if the lens action is running on the sprite, simply calling [sprite visit] to render it should also render the lens effect in its current state.
It doesn’t seem to when you are just trying to render a standalone CCRenderTexture that you want to export as a photo.
The issue was CCGrid3D is limited to the using the window size, so when you apply a CCLens3D to a render texture of say 2048 x 1536 it was clipping. Sub-classing CCGrid3D and adding an initializer that constructs a texture to the size of the image, plus overriding the 2D & 3D projection methods to work with the image size and not the window size worked lovely…
[…] KKScreenshot from the Screenshots, Motion Blur and Drawing with CCRenderTexture post […]
Hello,
I was wondering what you think of the render texture size for retina displays? Take the new iPad for example, would you make the texture size 2048*1536 for the drawing/sketching example? Is the quality of the resulting PNG of a drawing worth the extra storage space?
Thanks!
It really depends on the application. For some uses it is justifiable, for others it is not. If you have the memory available, and performance is good, then you will want to default to using the Retina resolution.
dude you are a life saver, i cant express how much this has helped me. i know have added the final touches to my app. just waiting for the voice overs to come back from the studio and then i can upload. i owe you big time!!!
kind regards
Thanks for the excellent information. However, I notice a 1-3 second delay when trying to save a CCRenderTexture to an image using this approach on the new iPad (due to its high resolution). I have been trying to capture screenshots of a particular render texture in this manner (I don’t want a direct copy of the entire screen w/ HUD) but this performance hit causes all gameplay etc. to freeze which is not acceptable in my particular project.
Specifically I tracked the issue down to the ‘begin’ method of CCRenderTexture, “ccglBindFramebuffer(CC_GL_FRAMEBUFFER, fbo_);” which actually swaps the framebuffer so without this the entire screen is saved. I don’t know anything about OpenGL but wish there were another way to save a particular CCRenderTexture without having to call ‘visit’ first.
It may be faster if you don’t clear the render texture (not sure if that’s what you did). But this won’t work in all cases.
Needless to say, render textures are slow, and particularly so the higher the resolution. And if you’re saving to a PNG file, it gets even slower. The only thing might be to capture the rendertexture, get the UIImage, and save the UIImage to disk in a separate thread (operation queue, asynchronously).
Note that you can’t thread access to the rendertexture, OpenGL functions have to be executed on the same thread used by the OpenGL view/context.
Hi, I need to make a texture from a CCSprite with alpha and how do you say in the ‘How to create sprites from a CCRenderTexture’ the image gets rendered opaque. I’ve tried everything with blending but I never get alpha channels works. Do you know any technique?
thank you for this great post!
It’s got to be one combination of blendFunc, and of course setting opacity on the sprite.
Hi,
Thanks for the great tutorial, really helped me a lot!
I have a question though, I’m busy writing a sketching application which will use different brushes (similar to what you did in the Drawing / Sketching with CCRenderTexture section) and notice that if you draw very quick there are gaps when the sprite’s location gets updated.
I suppose thats because scheduleUpdate: gets called every frame, correct? Do you have any suggestions how I can overcome this issue so drawing is continues irrespectively how quick you draw?
Thanks a lot.
This is because quick drawing means the distance between two touch locations will be rather large. What you need to do is to subdivide each new touch location based on the distance to the previous touch location and create additional in-between points. Let’s say if the distance is greater than 10 points you’ll want to split that line between current and previous touch locations so that additional points are added, each 10 points further away from the previous one until you hit the destination point. You can also average the distance, so that the distance between each point is constant, but normally it doesn’t matter if the last added point and the actual touch location are only 3 points or so apart.
Hi. Thank you for the tutorial. I have one question…
You wrote: “Keep in mind that the visit message draws the node, not the draw method. If you have a node that does custom drawing in its draw method, and you want to render that node onto a render texture, you will have to move the drawing code from the draw method to the visit method.”
I would like to draw CCParticleSystemQuad onto CCRenderTexture.
Could you please explain a little bit more about which draw method code should I move to which visit method?
Just call [particleSystem visit] to draw on the render texture because [particleSystem draw] won’t give you the correct result (or none at all).
You only need to “move your drawing code” from -(void) draw to -(void) visit if you’re actually subclassing a node to perform custom drawing with OpenGL ES (and/or shaders).
Thank you very much, it works now…
But now I have another problem. I want the texture to be the same as my sprite’s shape (so that the Particles will be emitted only from that shape, not from the whole rectangle of the sprite). I found this:http://www.cocos2d-iphone.org/forum/topic/29428
to be very helpful, but it doesn’t work when I add retina support to my project.
My question is: what is the difference between getting the shape of a sprite in a project with retina support and without it?
Hello
Your Category CCSprite (RenderTextureCategory) doesnt work with actual Cocos2d
I think that you doesn’t have to sprite.scaleY = -1 in actual version of Cocos2D
just for your information