The Four Ways of Implementing a Scrolling View with Cocos2D Explained
There are two classes of scrolling, "fake" and "real".
Altogether there are four ways to create a scrolling view in Cocos2D: with CCCamera, with CCFollow, manually moving a layer and "faking it".
I’ll discuss each approach and show their advantages and disadvantages as well as point out for which types of games they work best.
The example projects for this article can be downloaded from github.
Fake Scrolling - Creating the Illusion of Movement
Ideal for "endless scrolling" games. Typical genres include jumping or running games like Doodle Jump and Canabalt, as well as shoot’em ups.
These games mainly scroll along one axis, often scrolling only in one direction. The other axis has a limited range or is not scrolled at all. The fake scrolling approach prevents the coordinates of game objects to "explode" to similarly infinite coordinate points. This could introduce rounding errors in floating point values which may accumulate over time, causing inaccuracies at later stages of the game.
To create the illusion of scrolling, at least two background image sprites are needed. Four are needed if you also want to scroll a little along the minor scrolling axis. The background images must be repeating seamlessly, and each must be at least the size of the screen. The trick is to use the two or four images and move them in the opposite direction of where the player is supposedly heading.

This creates the illusion that the player is actually moving in a certain direction. Once one background image has scrolled entirely outside the view, it will be repositioned by adding the width or height of the screen (depending on major scrolling axis) to the position of all background sprites. The player does not notice this repositioning, which allows the background sprites to continue moving in the current direction seemingly endlessly.
Game objects (enemies, items, etc.) usually enter the screen from the side towards which the player is moving, but any location is possible. You would normally spawn these objects one screen ahead (or behind) what is currently visible, then move them on screen. Without taking the scrolling rate into account when moving enemies, varying the scrolling speed would also speed up or slow down the movement of game objects, which is probably not what you want. This voids the use of CCMove* actions because they don’t consider external modification of the position property while they’re running.
From a game construction perspective this type of scrolling lends itself well for randomly generated worlds. You can alway use a certain location in front of or behind the scrolling direction to spawn new game objects. You always have only a relatively short list of game objects that are alive in this "world", so each object can be allowed to run relatively complex code.
And you can dismiss game objects easily by checking if they have moved past the threshold location. All coordinates are relative to screen coordinates, this makes it intuitive to work with positions. An object whose position is within the screen coordinates is guaranteed to be on screen.
Using object pooling you can reuse a predetermined amount of game objects of a certain type and thus also avoid spawning too many of the same type. For example if there can be 10 Zombies on the screen at once, you’d create 10 Zombies up front, set them to inactive and simply reposition and activate them to spawn one.
When you have 10 Zombies on the screen and game logic dictates to spawn another one, you can’t and the request is ignored. This design lends itself well to high performance and has built-in limits that avoid many (but not all) possibly unfair game situations that can occur in randomly generated worlds.
Code Example:
The scrolling effect is created by moving the background images. This example uses two images moving from right to left, to give the impression of movement from left to right. You can also put the background images into a separate layer and move them all at once by adjusting the layer’s position.
|
1 2 3 4 5 6 7 8 9 10 11 12 13 14 15 16 17 18 19 20 21 |
-(void) update:(ccTime)delta { CGPoint bg1Pos = _bg1.position; CGPoint bg2Pos = _bg2.position; bg1Pos.x -= kScrollSpeed; bg2Pos.x -= kScrollSpeed; // move scrolling background back by one screen width to achieve "endless" scrolling if (bg1Pos.x < -(_bg1.contentSize.width)) { bg1Pos.x += _bg1.contentSize.width; bg2Pos.x += _bg2.contentSize.width; } // remove any inaccuracies by assigning only int values // (prevents floating point rounding errors accumulating over time) bg1Pos.x = (int)bg1Pos.x; bg2Pos.x = (int)bg2Pos.x; _bg1.position = bg1Pos; _bg2.position = bg2Pos; } |
Use when:
- Your game should scroll endlessly or very far.
- Your game primarily scrolls along one axis, perhaps even in one direction. A "tube-like" world.
- Your game randomly generates most or all of the world as the game progresses.
Avoid when:
- Your game needs to scroll in any direction.
- Your game uses a "designed" world (predetermined locations of objects, backgrounds, etc) of finite size.
- Your game’s background images do not repeat.
Pros & Cons
 All objects use relative screen coordinates, easy to work with. No "explosion" of coordinate values in infinitely scrolling worlds.
 No conversion of touch coordinates necessary.
 Ideal for randomly generating content.
 The player character stays fixed or at least only moves within screen coordinates or a a little more.
 Code complexity increases if direction of scrolling can go both ways (ie right and left, or up and down) or allows scrolling at variable speed. CCMove* actions can not be used in these cases.
 Not suitable for two equally valid scrolling directions (ie square worlds). Main scrolling direction is either vertical or horizontal, with the other axis either not scrolling at all or only within a small range.
 Adapting to various screen aspect ratios (iPhone, iPhone widescreen, iPad) requires extra care.
"Real" Scrolling - Screen as View onto the World
Ideal for larger worlds. The player can travel freely in all four directions at any speed. Typical examples include games where the player traverses large worlds, for example Zelda or Super Mario.
You can scroll a world either by using CCCamera or my adjusting the position of a parent node. The CCFollow method falls into the latter category. The main difference between CCCamera and CCFollow or layer movement is that CCCamera moves the viewport over the fixed (non-moving) world whereas CCFollow or layer movement move the world underneath the fixed camera. The end result is the same.
Use when:
- Your game should scroll equally in any direction.
- Your game is a designed world, or randomly generated but has a finite size.
- Your game world is a tilemap.
Avoid when:
- Your game needs to scroll endlessly or very far (far = over ten thousands points in any direction).
- Your game relies on randomly creating its world. Even if it needs to scroll in any direction fake scrolling may be a better solution.
Scrolling with CCCamera
CCCamera is a wrapper for the OpenGL gluLookAt function. It has the most flexibility allowing free rotating, zoom and even perspective views. But it’s also more difficult to work with and not fully compatible with all aspects of cocos2d. CCMenu won’t work, and converting touch coordinates will be a challenge.
The biggest problem of CCCamera is probably that there’s a serious lack of expertise - there are many CCCamera related questions on the cocos2d forum and in other places, but hardly any good answers. Often questions remain unanswered.
CCCamera works differently than anything else in cocos2d, and affects cocos2d rendering in ways you may not understand or foresee. Therefore I strongly discourage anyone from using CCCamera unless that anyone is familiar with OpenGL viewport basics, gluLookAt and transformation matrices (conversion of screen to view coordinates) and the game requires scrolling features made possible only by using CCCamera.
For example if you want a driving game which should keep the car always facing up, rotating the world relative to where the car is going, then you’d have to use the CCCamera. Implementing this with layer movement will be a lot more difficult and certainly requires a different approach to how the car movement is handled: the car would actually never rotate, it would always face in a fixed direction while the layer it is driving on rotates.
Code Example:
You first need to get all the camera values by reference (¢erX) in C programming language fashion. Then you need to update both center and eye to be at the same position in order to maintain an orthogonal (top down) view. Introducing 3D effects is as simple as allowing center and eye to deviate. Then you must set all values back to the camera, including those you haven’t modified to ensure you don’t accidentally change one of the values you didn’t modify.
For example, if you hard code the value 0.0 when setting centerZ and eyeZ, for some reason the screen goes black even though the values for centerZ and eyeZ returned from CCCamera are 0.0 as well. This is just one of the oddities of CCCamera.
|
1 2 3 4 5 6 7 8 9 10 11 12 13 14 15 16 17 18 19 20 21 |
-(void) update:(ccTime)delta { // get the layer's CCCamera values float centerX, centerY, centerZ; float eyeX, eyeY, eyeZ; [self.camera centerX:&centerX centerY:&centerY centerZ:&centerZ]; [self.camera eyeX:&eyeX eyeY:&eyeY eyeZ:&eyeZ]; // set camera center & eye to follow player position (centered on screen) centerX = eyeX = (_player.position.x - _screenSize.width * 0.5f); centerY = eyeY = (_player.position.y - _screenSize.height * 0.5f); // Make sure not to scroll near the world boundaries, to prevent showing the area outside the world. // Note: this code does not take into account zooming out or in by modifying the camera's eyeZ value. centerX = eyeX = clampf(centerX, 0.0f, _worldSize.width - _screenSize.width); centerY = eyeY = clampf(centerY, 0.0f, _worldSize.height - _screenSize.height); // update the camera values [self.camera setCenterX:centerX centerY:centerY centerZ:centerZ]; [self.camera setEyeX:eyeX eyeY:eyeY eyeZ:eyeZ]; } |
Use when:
- Your game needs a perspective view, or rotation animations, or elaborate zooming actions that would be difficult to implement with any of the other scrolling methods.
Avoid when:
- Always, by default.
- If you do not have an understanding (and don’t want to learn about) gluLookAt, the OpenGL viewport, coordinate conversion.
- If you want to use CCMenu in your in-game user interface.
Pros & Cons
 Scroll in any direction.
 Also allows to zoom in/out of the world as well as rotation and even perspective (3D) effects.
 CCCamera is not well documented or tutorialized. It’s also rarely used so it’s hard to get (good) answers to CCCamera related questions. Many issues require a deeper understanding of OpenGL.
 CCCamera uses an awkward C-style interface for getting and setting position and look at points.
 Touch coordinates must be converted to world coordinates. Conversion is complex, involving camera coordinates and "magic numbers".
 Not fully compatible with all nodes. For example CCMenu will not work correctly because it does not implement the necessary touch coordinate conversion.
 When zooming with CCCamera there is a value range threshold where objects start to disappear. This threshold is different on different devices.
Scrolling with CCFollow
CCFollow works by changing the position of the node that is running the CCFollow action relative to the position of the followed node. Typically you’ll run it on the layer that contains the node (usually the player-controlled object) to be followed.
CCFollow should only run on non-drawing nodes (CCNode, CCLayer, CCScene) and should follow a node that is one of its direct children. Especially if the followed node is not a direct children you might notice that the screen follows the object but it does so at an offset.
CCFollow is the easiest way to create a scrolling view, but it’s also the least flexible. You can choose between limitless scrolling, or scrolling that stops at predefined (world) boundaries. That is all. For everything else you’ll have to subclass CCFollow and add whatever code you need to improve the scrolling behavior.
Code Example:
CCFollow requires the least amount of code to implement scrolling. Just add this code in init or onEnter to allow the layer (self) to scroll so that the followed node (_player) is always centered on screen.
In addition this code enables the world boundaries check so that scrolling stops before any part outside of the world becomes visible. The player is still able to move up to the world border, or even beyond that if you don’t limit the player’s movement as well.
|
1 2 3 4 |
// Let the layer follow the player sprite, while restricting the scrolling to within the world size. // This is really all you need to do. But it's really all you *can* do either without modifying CCFollow's code. CGRect worldBoundary = CGRectMake(0, 0, _worldSize.width, _worldSize.height); [self runAction:[CCFollow actionWithTarget:_player worldBoundary:worldBoundary]]; |
Use when:
- You need to get started quickly with a scrolling view.
Avoid when:
- You need to influence any scrolling parameters, such as how closely the node is followed or how the scrolling accelerates and decelerates.
Pros & Cons
 Scroll in any direction.
 Always keeps the followed node centered.
 Allows to specify world boundaries to clamp scrolling at world borders.
 No control whatsoever. Follow speed, follow range, acceleration/deceleration of scrolling movement, prevent scrolling in a particular direction, and so on - none of that is supported.
 Changes position of the node running the action. Typically that will be a layer, so it shouldn’t matter.
 Touch coordinates must be converted to world coordinates using built-in convertToWorldSpace.
 Implementing zoom in/out centered on a particular object is difficult. Rotating relative to an object is very difficult.
Custom Scrolling by subclassing CCFollow
This is essentially the same method that CCFollow uses, but you will have to implement any additional behavior yourself. Typically you will want to subclass CCFollow because that’ll be easier, but you can also rip out the guts of CCFollow and put the scrolling code in your layer’s update method.
For example if you want the scrolling to happen only when the followed node is getting close enough to one of the screen borders, you’d have to subclass CCFollow, override the step method, put the original code back in and then start modifying how CCFollow updates the position. An example is given in the CCCustomFollow demo.
The main downside caused by moving an underlying layer is that the position of that layer is the inverse of the actual movement. For example to scroll 100 pixels to the right, you have to subtract 100 pixels from the layer’s position, which then may have a negative position of -100. You may find it counterintuitive that the targetPos CGPoint in CCFollow uses mostly negative coordinates.
Code Example:
First create a subclass of CCFollow, in this case I named it CCCustomFollow. Initialize it like CCFollow above, and override the step method in CCCustomFollow. You can start with the CCFollow code as basis, understand it first, then start modifying it.
This example prevents scrolling while the followed node is within 120 points of the center. Once the followed node crosses that distance, the scrolling will start following the followed node. This is a very simplified example of "border scrolling".
You still need to improve this code in several ways, for example to ensure that the scrolling correctly stops at world boundaries and perhaps to improve it so that the non-scrolling area is not a circle but a rectangle. You might also attempt to scroll faster when the followed node leaves the threshold so that the followed node becomes centered on the screen again. All of those tasks aren’t exactly trivial, but they’re manageable if you have a reasonably solid understanding of trigonometry.
-(void) step:(ccTime) dt
{
  // The targetPos coordinate values become more negative the more the followed node moved to the right and up.
  // This is because the layer is moved in the opposite direction of where the followed node is heading.
  CGPoint targetPos = ccpSub(halfScreenSize, followedNode_.position);
  targetPos.x = clampf(targetPos.x, leftBoundary, rightBoundary);
  targetPos.y = clampf(targetPos.y, bottomBoundary, topBoundary);
  // initialize currentPos once
  if (isCurrentPosValid == NO)
  {
    isCurrentPosValid = YES;
    currentPos = targetPos;
  }
  // if current & target pos are this many points away, scrolling will start following the followed node
  const float kMaxDistanceFromCenter = 120.0f;

  float distanceFromCurrentToTargetPos = ccpLength(ccpSub(targetPos, currentPos));
  if (distanceFromCurrentToTargetPos > kMaxDistanceFromCenter)
  {
    // get the delta movement to the last target position
    CGPoint deltaPos = ccpSub(targetPos, previousTargetPos);
    // add the delta to currentPos to track followed node at the distance threshold
    currentPos = ccpAdd(currentPos, deltaPos);
    [target_ setPosition:currentPos];
  }
  previousTargetPos = targetPos;
}
Use when:
- You need full flexibility over the scrolling behavior.
Avoid when:
- You need functionality only CCCamera can provide, such as rotation relative to followed node’s movement direction.
Pros & Cons
 Scroll in any direction.
 More scrolling flexibility - if implemented.
 Do it yourself, but you can use the CCFollow code as basis. Here’s another good starting point but the code has "All Rights Reserved".
 May feel counter-intuitive, since position of the node (layer) that causes the scrolling effect is the inverse of the actual scrolling direction.
 Touch coordinates must be converted to world coordinates using built-in convertToWorldSpace.
 Implementing zoom in/out centered on a particular object is difficult. Rotating relative to an object is very difficult.
Check out the Code
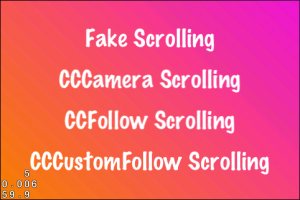
Get the example projects from github. Comparing the code for the four demo projects should help you gain an understanding for how the various scrolling methods work. The relevant code sections are well commented.
All demos include simple collision detection code, there’s no coordinate conversion involved. The player’s coordinates are printed over the player sprite. You’ll see that none of the scrolling methods change the way collision detection works. But you will notice a difference in behavior regarding the “Back” button.
For endless games I recommend to look into the fake scrolling approach, for all others I would pick CCFollow and perhaps customize it later on by subclassing it. Do not use CCCamera unless you absolutely have to, and even then consider if perhaps you can change your game’s design to accommodate for CCFollow scrolling.
If you liked this article, please share and tweet it using the social buttons below, thank you!
PS: there’s still time to grab these Cocos2D Starterkits for 50% off.
| Follow @gaminghorror | Follow @kobold2d |
|






What about using UIScrollView to recognize gestures and passing them on to your prefered CCNode. I dont see any other way of getting the true native feeling with pan, zoom, bounce and deceleration.
True, and in fact I did that in an app. I used it for the highscore and achievements list because they needed that UIScrollView feel. Problem is, it’s really tricky to implement. I had to add a locking semaphore to CCDirector’s draw method in order to keep updating both the scroll view and cocos2d simultaneously. The alternative solution appears to be to lower the cocos2d animation interval to 30 fps for the screens in question. I tried that first however it never really worked well for me, the scroll view did not always animate correctly.
Here’s the bulk of the CCDirector changes (for cocos2d-iphone v1.0.1) to allow cocos2d & UIScrollView work together well. Whenever a screen with a UIScrollView loads, the useCocoaFriendlyRendering BOOL is set.
Fantastic article, which is relevant and timely to code I am working on at this very moment! Comments:
1. You mentioned the following in the article as a disadvantage of real scrolling:
“Your game needs to scroll endlessly or very far (far = over ten thousands points in any direction).”
The obvious question is how to conquer large map scrolling. Would love to see that as a future blog post, or a forum discussion, or offline, whatever your preference.
2. Reading the CCFollow approach, my gut is that while it works, an action isn’t ideal. This kind of ties into our side discussion about KoboldTouch model / view controller processing sequence, but I would think that this might be able to be managed in a more direct fashion with the node hierarchy. If node positioning is relative to parent, it seems like there is really an opportunity here to manage this in straightforward fashion with a custom node at the top of the hierarchy that represents screen space, with one direct child node that represents world space. The screen space node would act as a viewport to the world space node by listening for input and adjusting the world space node position accordingly. Then node of the actual game objects need to even worry about it, they just position themselves in world space, and the screen space node adjusts itself accordingly (presumably as the last step in model updating after all game objects have updated their positions). A future KoboldTouch class, maybe?
Thanks for the post and code, great stuff!
Brad
1. In very large worlds you want to round positions of game objects down to integers to avoid accumulating rounding errors. Though the biggest issue is a matter of resource usage that makes large worlds not very practical, or very difficult to implement (streaming).
2. CCFollow actually does that, updating the world space node’s position (typically that’s going to be a layer). In KoboldTouch the KTTilemapViewController’s model will take responsibility of setting the view offsets while the KTTilemapLayerViewControllers will position their views based on the global offset. That way parallax scrolling layers can be implemented by adjusting how each layer interprets the view offset. Same goes for object layers. Setting the view offset can be either direct to a certain location, or with convenience methods like “scroll to object X / tile coordinates with speed”.
I won’t be using cocos2d actions for this, but I want to add something like actions to models where they belong. So basically being able to run actions on models, which subsequently update their views. Same end result but without the conflict of the view doing something on its own separate from the model.
Thanks for the article. I want to use the fake scrolling method in my game to make an endless vertical scrolling layer that gives the impression that the main character is moving upwards. I have been brainstorming on how to achieve this.
My issue is that I want objects to appear as if they are coming from above and below the screen at the same time. Secondly, I want to be able to move the main character to create and destroy box2d joints between it and some of the objects appearing on the screen. I would appreciate any help on this.
Fake scrolling is not going to work well with a physics engine, in that case use one of the other methods. Problem is that physics objects would have to be reset as well, and physics engines don’t really like manual repositioning of bodies (it’s inefficient, can even lead to glitches).
Perhaps reset the scene once the user went too far, or have a hard limit very, very far out. The problem with true endless scrolling is that floating points are used for position, and that gives you a max of 16 million integer positions the float can represent (Minecraft has the same problems). But you can still scroll very, very far.
Thanks for the advice. From your experience which approach would you recommend, given the issues I stated earlier. Also I don’t fully understand what you mean by “Perhaps reset the scene once the user went too far, or have a hard limit very, very far out”.
Well, floating point can only represent 16 million integers. Meaning if you scroll as far as 16.000.000 points in any direction, weird things can happen. Sprites may move erratically because they may move one or more pixels further than expected, or not at all for a few frames. If you limit your scrolling to 16 million points in both directions you should be fine. The alternative would be to reset the scene when you do get that far, meaning to reposition all objects so they’re closer to the center of the scene in order for the “endless” scrolling to keep going forever but without any glitches.
[…] Great tutorial about scrolling in cocos2d including sample project - LINK […]
Great article, thanks!
In my implementation, I want to have multiple viewports in a scene. Also, it involves parallax scrolling. What would be the best way to implement it? Right now, I’ve been trying to implement it the harder way with a bunch of maths and it is a bit buggy.
Thanks again.
I have a sticky problem in my code, it scrolls nicely sideways but does not scroll up or down. I haven’t modified the CCFollow, I use the standard code.
CGRect worldBoundary = CGRectMake(0, 0, (tileMap.mapSize.width * tileMap.tileSize.width), (tileMap.mapSize.height * tileMap.tileSize.height));
[self runAction:[CCFollow actionWithTarget:character worldBoundary:worldBoundary]];
By all means it should be able to scroll up and down too, I have tried to increase the height values etc but nothing seems to work.